Call charges (Billing Service)
Note
This service is available starting from firmware version 4.9.6 as an additional feature included in the “Starter Kit” license of the Hotel module
Description
The Call charges service on KalliopePBX allows the calculation of the costs of calls made from each extension associated with a room, through the definition of a cost profile that can be differentiated according to the destination (with a specific prefix, exact numbers, all other numbers) and the outgoing line used.
The Call charges configuration consists in the definition of one or more charging profiles, which are of a set of routes – identified by prefix, exact selection or all other numbers – each associated with a charging rule. The charging rule makes it possible to calculate the cost attributable to the call based on its duration, using four parameters:
The cost of the connection fee;
The duration in seconds included in the connection fee;
The cost of the subsequent connection fees;
The duration in seconds of each subsequent connection fee;
These 4 parameters allow the creation of Flat pricing profiles (e.g. a fixed response price that includes the entire duration of the call), per second without response time (by setting the period of the steps to 1 second), or the classic step profiles. Once at least one billing profile has been defined, it is necessary to associate it with the outgoing lines used by the rooms (each outgoing line can be associated with a different charging profile) so that a cost, calculated using this profile, is associated with the calls made. At the moment, there are no differentiated tariffs for time bands or days.
Configuration
The availability of the call charges service is subject to the presence of the Kalliope Billing Module license. In the case of Multi-Tenant nodes, it is necessary to assign the license to all Tenants in which it is required to use the service.
The call charges service is configured in the “PBX Applications” –> “Billing Module”. The visibility of the panel and its tabs is conditioned by the permissions associated with the user’s role
The panel has two tabs:
General Settings
Billing Profiles List
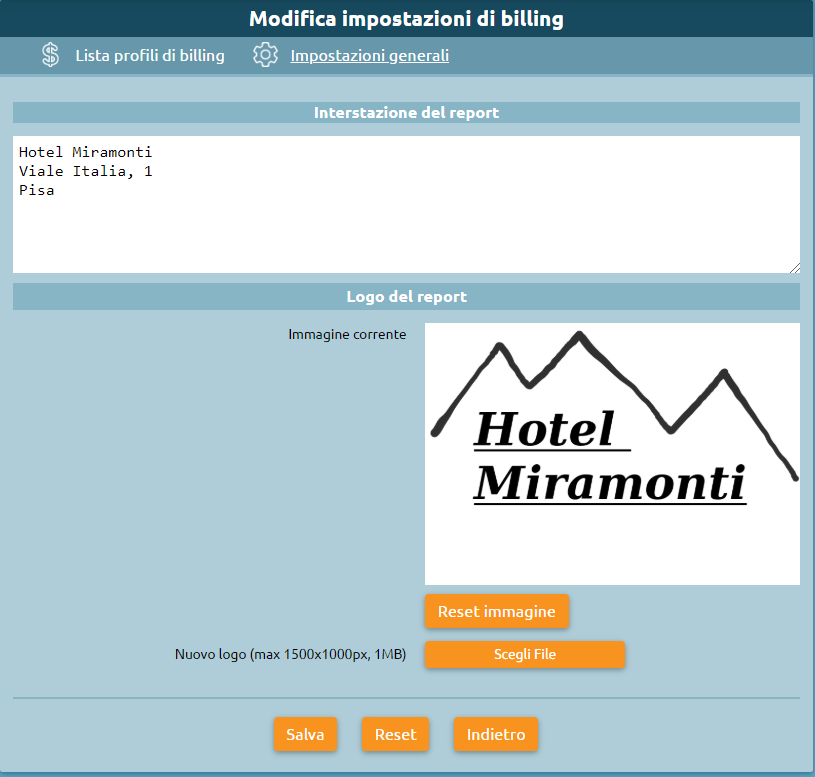
In the “General Settings” panel, it is possible to upload an image (e.g. logo of the structure) and a header; these are used to customize the report generated by the system with the list of calls made and the related costs.
Note
The report is generated in XLSX format; the header and the image are inserted inside the header of the spreadsheet, so in the “Normal” view, they are not shown on the screen, but only in the “Page Layout” view or in print preview.
Note
LibreOffice or OpenOffice software, in current versions, does not support the insertion of images inside the page header, so the image will not be displayed if one of these applications is used to open the report.
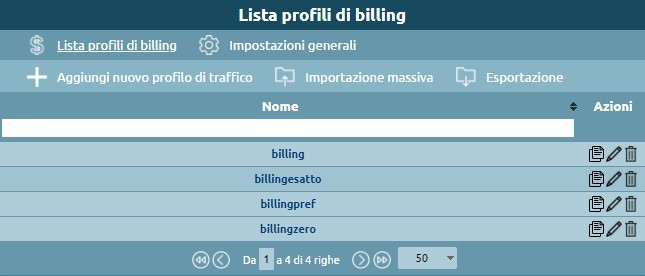
The “Billing Profiles List” panel lists the billing profiles created by the user, which must then be associated with the outgoing line so that the cost to be charged for each call made is correctly evaluated.
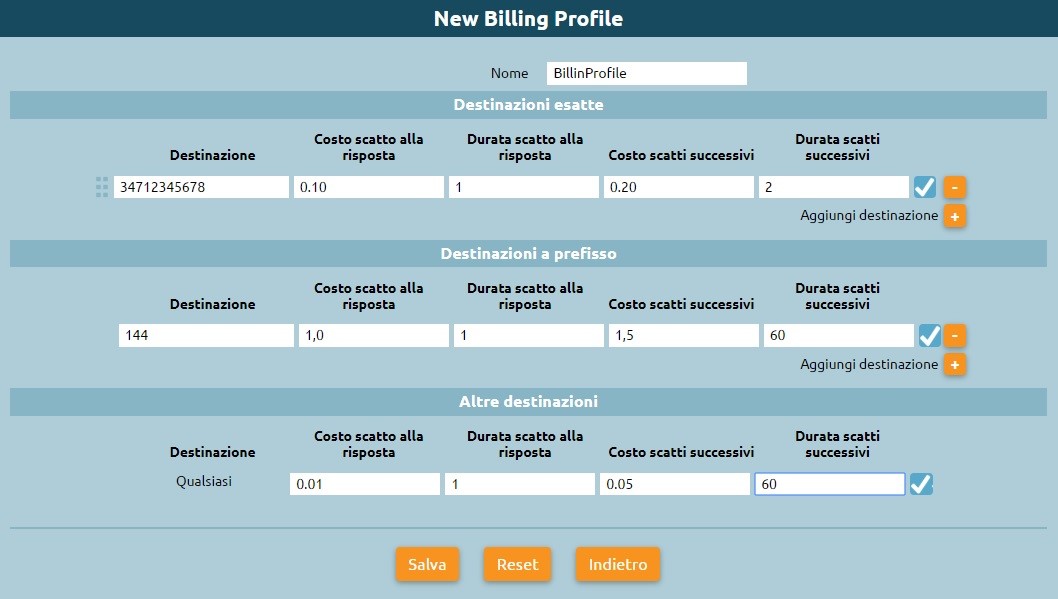
By selecting “add new traffic profile” the administrator, or delegated user, can configure multiple charging profiles. Each profile contains a list of charging rules that will be matched based on the number called. The rules are grouped according to the selection match mode: exact match, prefix match, or any. In the case of prefix dialing, a “longest match” type of matching is performed, then the charging rule is selected for the most extended selection among those present that matches the called number. When the rules are saved, they are automatically sorted according to this principle to make the visual feedback more immediate. As an example, if the following prefix destinations are configured:
0
00
001
050
003
0033
the order in which a called number will be found will be:
001
003
0033
00
050
0
Therefore, a call destined to the number 001555123456 will be charged according to rule 1, a ring destined to 0041234567 will use rule 4, while all urban calls (unlike those destined to Pisa numbers) - 050 - will use rule 6.
Finally, each rule is completed by the charging parameters, where costs are expressed in Euros (and fractions) and times in seconds:
Cost of the connection fee;
Conversation time included in the connection fee;
Cost of subsequent connection fees;
Duration of the subsequent connection fees.
Only outgoing calls with call times higher than zero seconds are included in the report.
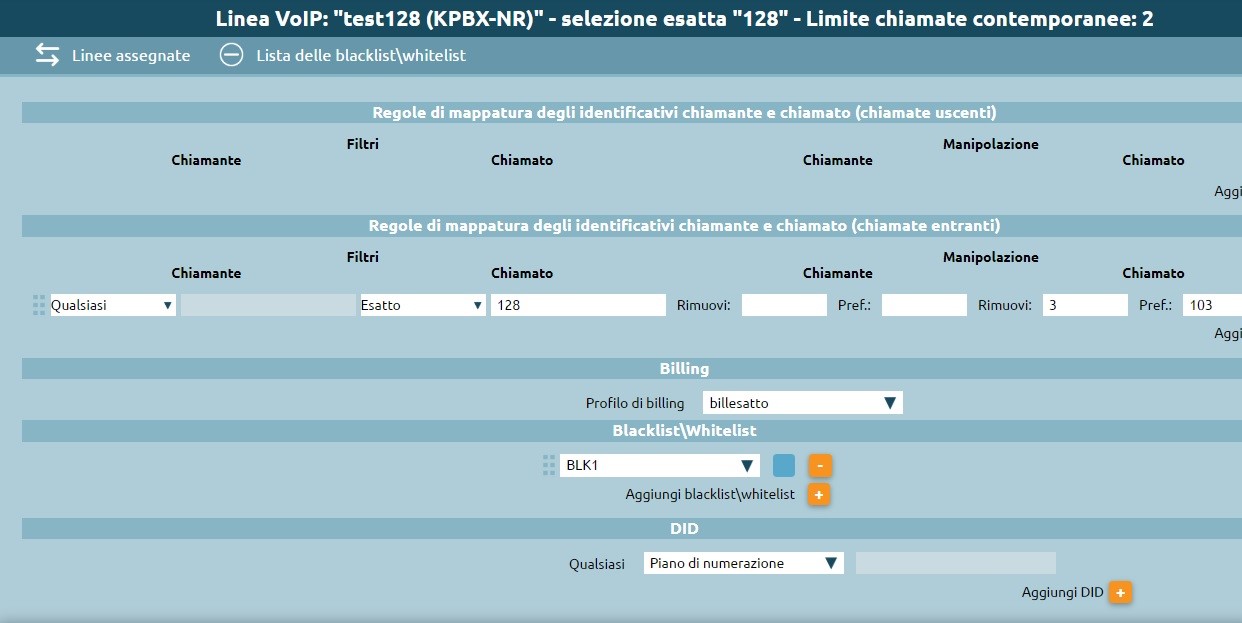
Once one or more billing profiles have been created, it is necessary to associate them with the output lines from the configuration panel of each of them (Gateway, Trunk or Terminations in the case of a Single-Tenant central unit or Assigned Lines in the case of a Tenant of a Multi-Tenant node) by selecting the billing profile in the section of the same name.
Data visualization and report generation
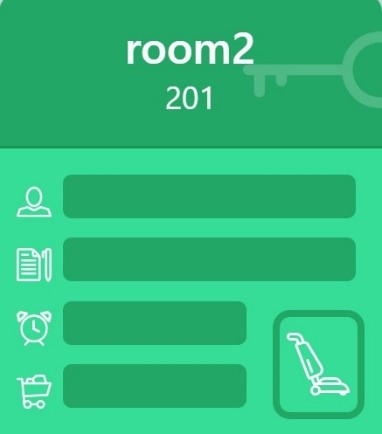
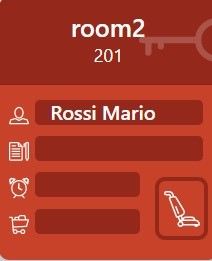
The total cost of calls made from a room is displayed in real-time on the widget of the room itself, present in the receptionist dashboard. In this way, it is immediate to visualize anomalous consumptions by a room and eventually modify the enabling class to block or limit further outgoing calls.
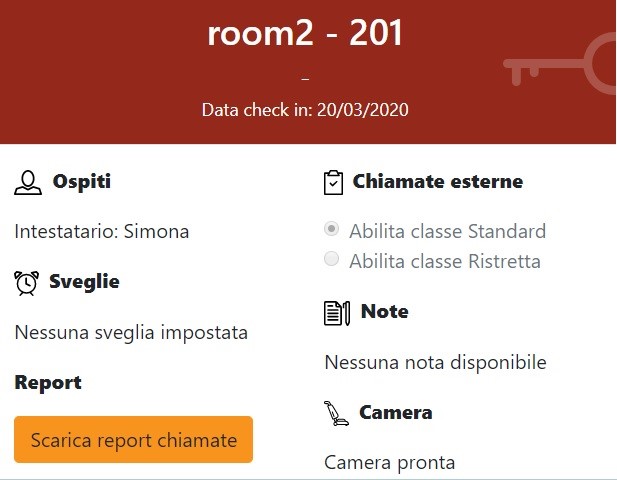
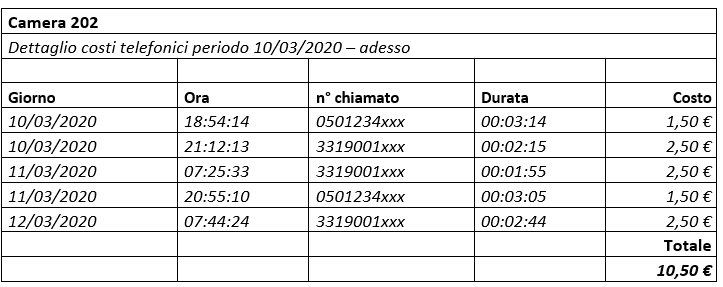
Entering the detail of the room, there is a button (“Download Call Report”), which allows downloading the report in XLSX format containing the details of calls made from the moment of check-in to the moment of report generation (including date and time of the ring, the destination number - anonymized in the last three digits - and the duration of the conversation) and the related costs.
Di seguito si riporta un esempio del report generato (al netto della formattazione di pagina):
Billing Profile Cloning
As seen above, the “List Billing Profiles” panel lists the billing profiles created by the user. By selecting “add new billing profile” the administrator, or the delegated user, can configure multiple billing profiles, but it is also possible to clone an existing billing profile.
Selecting the document icon, the “New Billing Profile” panel will open.
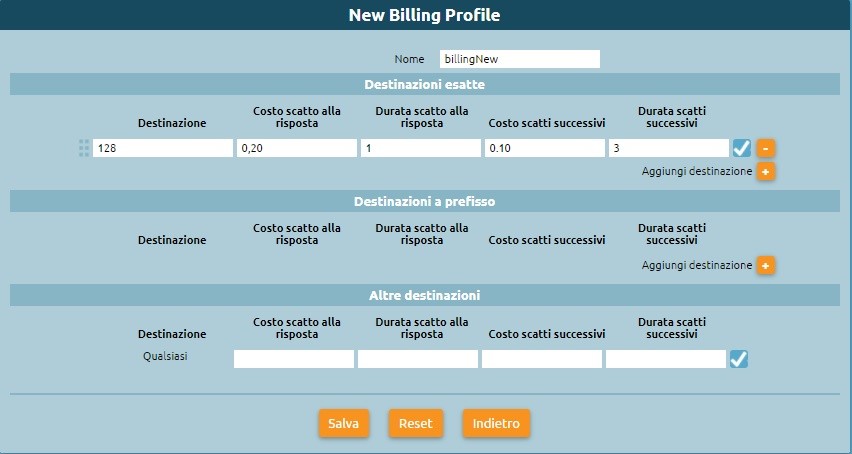
The panel has the same settings of the profile we want to clone and editing the name or modifying the destinations data, by selecting “Save”, the new profile will be created.
Import
It is also possible to perform the massive import of the billing profiles. By selecting the item “mass import” in the “Billing Profiles List” panel, it is possible to upload an Excel file containing one or more billing profiles.
The Excel file must respect the format of the following template:

Name: Indicative name of the billing profile
Type: Indicates whether the billing rule is associated with exact (exact), prefix or any other number (any)
Selection: Number or prefix with which the rule is associated
ConnectionFee: Cost of connection fee
ConnectionDuration: Duration of connection fee
nextUnitsFee: Cost of subsequent connection fees
nextUnitDuration: Duration of subsequent connection fees
Enabled: Flag indicating whether the billing profile is active or not
Export
From the “Billing Profiles List” panel, it is also possible to export the billing profiles created in an XML format file. Selecting “export” in fact, an Excel file is created that contains the data of the billing profiles created as the following:
