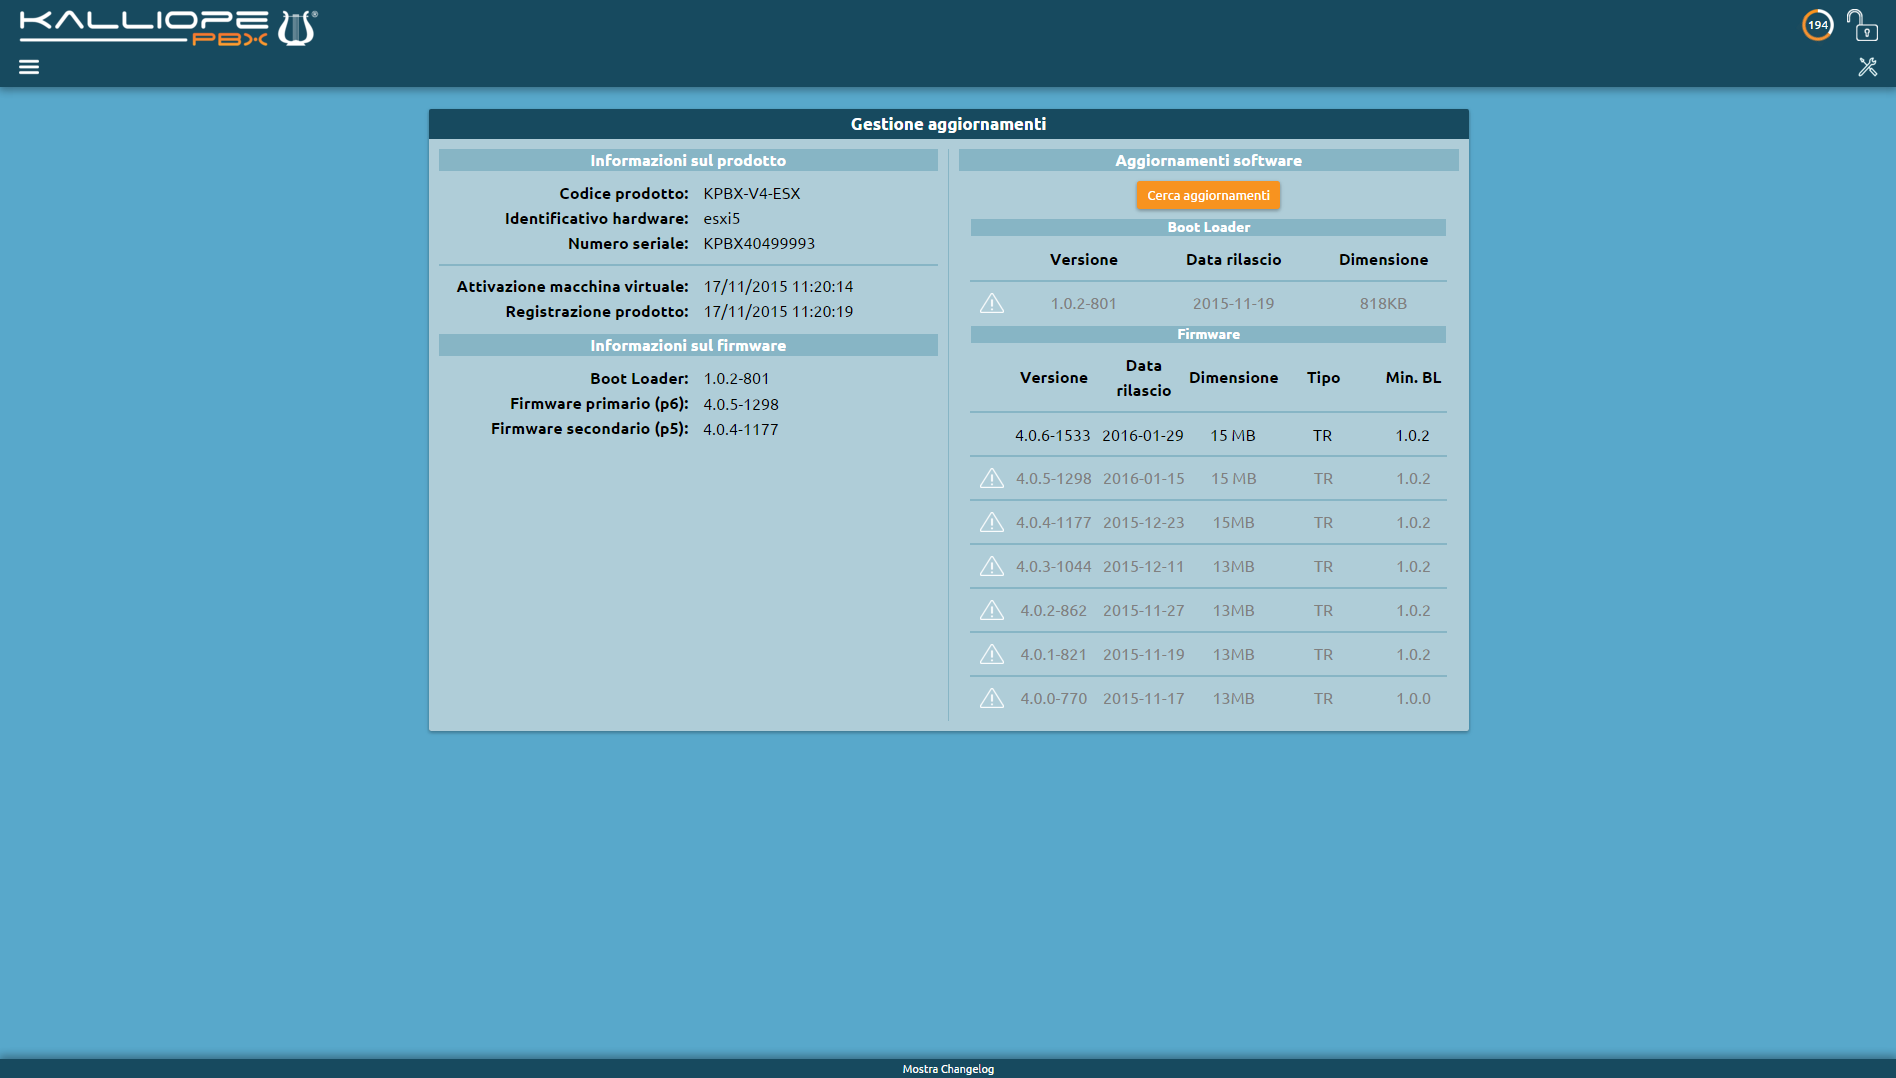
Other services
High Availability
Description
High availability aims to increase the performance of the VoIP system by bringing together two physical nodes or two virtual machines that work together in active/passive mode. Only one of the two PBXs is active in a specific moment, while the other is on standby and is ready to take over call service when the passive node fails. There is no retention of calls in progress during transferring resources from one node to the other By design, the failure that a high-availability system intends to handle is a complete shutdown of the active node’s functionality at that time:
natively there is no case of monitoring service if it is not actiive, as instead happens in other redundancy mechanisms where the node is considered degraded, even if one of the services is not active
unpleasant episodes can happen if the two nodes that are part of the cluster, lose their sight of each other, because each of them is convinced to be the only one and therefore activates, causing a “split brain” situation
The High availability panel is accesible only to the admin or in case of Multitenant machine, to the PBX Admin.
Configuration
We have to go to Settings > High Availability Status This takes us to the High Availability Configuration page.
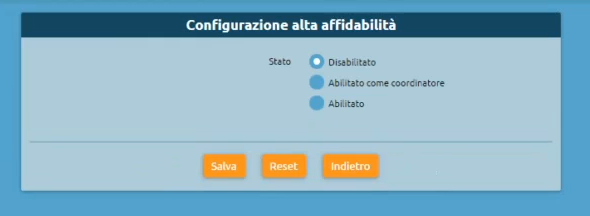
You can change system’s status as “Enabled as Coordinator” or “Enabled”. For example, we can choose “Enabled as Coordinator” for a node to keep as coordinator and select (from another browser tab) another node as “Enabled”, which will act as a secondary and receive the configuration from the other node.
Network settings
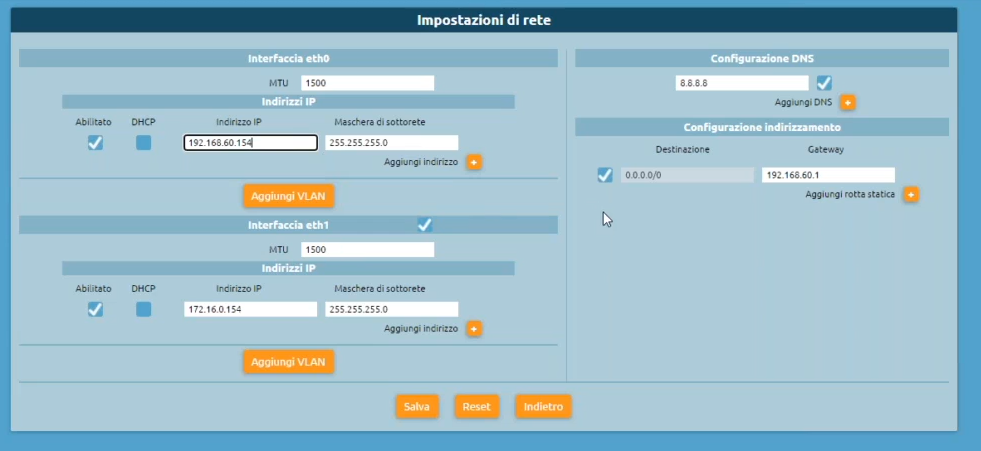
For a complete configuration, you need to go to Settings > Network settings and check that two network interfaces are configured for high availability, checking their own IP address. The two interfaces are connected to the same virtual switch that has no public interfacing. It has a single DNS configured and a route.
High Availability Configuration
Service Configuration (Abilitato come coordinatore)
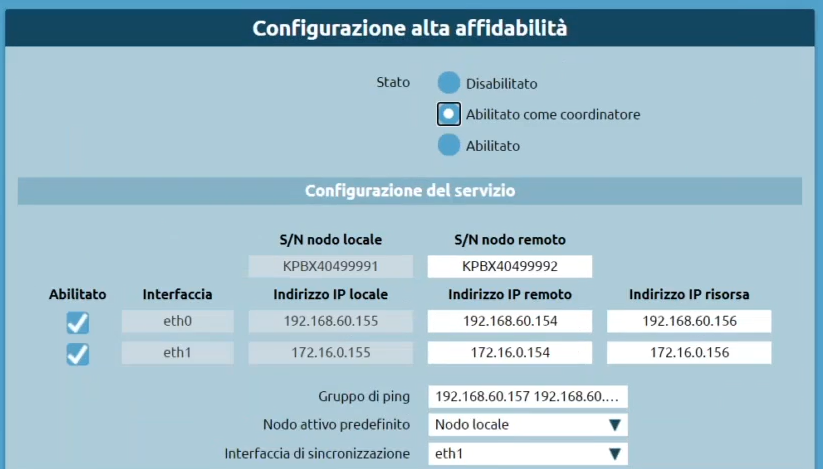
S/N remote node: it’s the serial number, the first communication between the two exchanges (coordinator and secondary node) works with an interactive SSH session, in which you have to insert user and password for autentication. The password is calculated from the serial number of the machine. So the coordinator node needs to know the serial number of the other node to get the password to connect with and provide the necessary commands
Enabled: you can choose which service to configure on one or both of them
Interface: it is possible to see all the network interfaces present on the machine
Local IP Address: you can see which is the local IP address
Remote IP Address: you can view the remote IP address.
Resource IP Address: it’s the IP address that will be acquired and shared on a given interface
Ping group: you can insert the IP addresses separated by spaces and they will be the nodes that each of the two will ping periodically to check which one sees more of them
Synchronization interface: you can insert a chosen interface that will be used for synchronization of data and logs between the two nodes (e.g. eth1)
Default active node: you can choose which of the two nodes should acquire the default resource in case of indecision.
Advanced settings
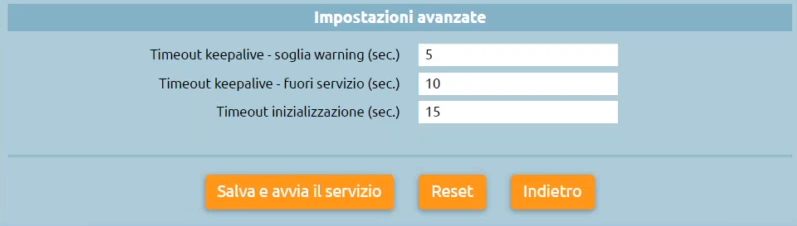
Timeout keepalive - warning threshold (sec.): this is a threshold after which a warning is generated (at the moment only in the logs)
Timeout keepalive - out of service (sec.): this value defines after how long the node is not communicating with the other node, it must be assumed that it is inactive, and therefore if the other node may acquire resources
Initialization timeout (sec.): this value guarantees a specific number of seconds before deciding to acquire the resources (if there is already an active node). The higher the value, the more time the machine will take at startup to become operational because both nodes wait for this time
By pressing “Save and start service” you can save the setting to the database and the high availability can start.
High Availability Status
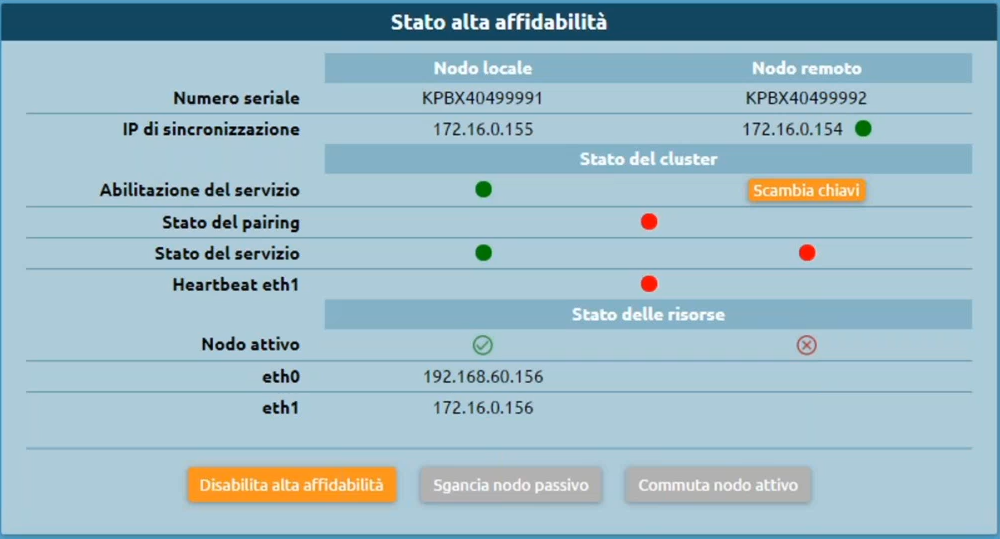
After saving the configuration, we are on the High Availability Status page where we can view:
The nodes with their respective serial numbers and synchronization IPs
The cluster status with the service enable, the pairing status, the service status, the heartbeat
The status of the resources with the active node
The cluster status - “pair” option: we will hook the secondary node and we will be able to see the status panel in passive mode:
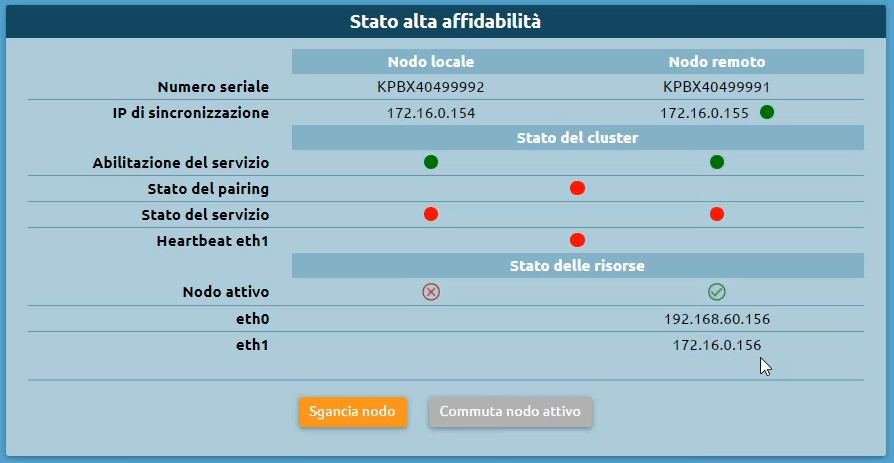
High availability passive node status
Unhook node: disable high availability, thus leaving the cluster degraded and the resource running on the active node
Switch active node: force resource acquisition
High availability active node status

Disable High Reliability: turns it off on both nodes
Unhook passive node
Switch active node: force resource switching on the other node
Scheduled Tasks
Scheduled task management
With this service (introduced in version 4.5.8) you can schedule tasks to be automatically carried out by KalliopePBX following a user-defined planning policy.
The types of tasks that can be scheduled are:
Send Call Center CDR
Send CDR (available with firmware version 4.7.0 of later)
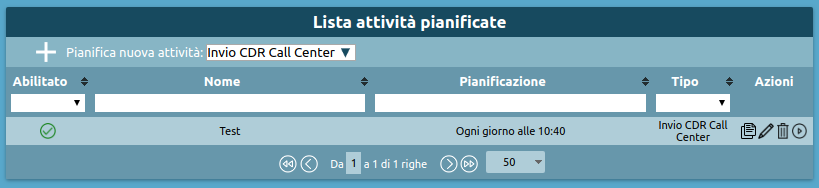
Defining a new scheduled task
You can set scheduled tasks on the Operating menu -> Monitoring -> Scheduled tasks page.
To add a new scheduled task click on “Schedule new task” in the top left after selecting the type of task from the drop-down menu.
How to create a new scheduled “send Call Center CDR” task
Note
This type of scheduled task requires a Call Center license to be present on the PBX.
Select “Send Call Center CDR” from the drop-down menu and click on “New scheduled task”. A form, pictured below, will appear.
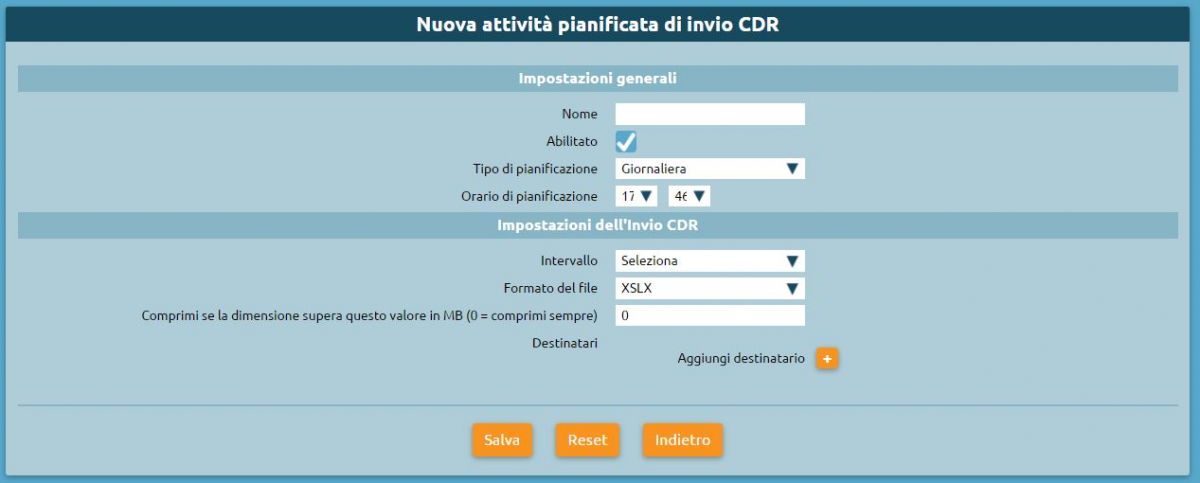
The following table lists the parameters that need to be configured:
General settings
Parameter |
Description |
Value |
|---|---|---|
Name |
The name assigned to the scheduled task. This name will appear in the subject line and the body of the emails sent upon completion |
Alpha-numeric |
Enabled |
Enable or disable the scheduled task. Disabled tasks will only be carried out manually |
Yes / No |
Type of schedule |
Select how often the task will be carried out |
Daily / Weekly / Monthly |
Scheduled time |
Select the time at which the task will be carried out and and the result sent via email to the configured addresses. |
Hours and minutes |
Day of the week |
Only available if the schedule is set to “Weekly”. Lets you set the day of the week on which the task will be carried out (at the time selected above) and the result sent via email to the configured addresses. |
Day of the week |
Day of the month |
Only available if the schedule is set to “Monthly”. Lets you set the day of the month on which the task will be carried out (at the time selected above) and the result sent via email to the configured addresses. |
Date |
Settings for sending the Call Center CDR
Parameter |
Description |
Value |
|---|---|---|
Time span |
Select the time span based on which you wish to export the Call Center CDR. |
Current day / Previous day / Current week / Previous week / Current month / Previous month |
File format |
Select the format of the exported Call Center CDR. |
XLSX / XLSX (detailed) / CSV / CSV (detailed) / JSON / XML |
Export operator events |
If selected, this will add all operator events to the exported Call Center CDR. This setting can only be enabled if a “detailed” file type has been selected. |
Yes / No |
Compress if file size exceeds this value in MB (0 = always compress) |
Indicate a maximum acceptable file size (in MB); if the file exceeds this, it will be compressed to zip format before being sent as an attachment. If this value is set to 0, the report will always be compressed regardless of its size. |
Numeric |
Notify all supervisors |
Select whether or not the exported Call Center CDR will be sent via email to all users with a supervisor role who have a configured email address. |
Yes / No |
Recipients |
In conjunction with or as an alternative to notifying the supervisors, you can specify an arbitrary number of recipients to which the exported Call Center CDR will be sent. |
Alphanumeric |
Note
Either one or more recipients must be set or notifications to supervisors must be enabled, otherwise the form will display an error message and the scheduled task settings will not be saved.
How to create a new scheduled “send CDR” task
Select “Send CDR” from the drop-down menu and click on “New scheduled task”. A form, pictured below, will appear.
The following table lists the parameters that need to be configured:
General settings
Settings for sending the CDR
Parameter |
Description |
Value |
|---|---|---|
Time span |
Select the time span based on which you wish to export the CDR. |
Current day / Previous day / Current week / Previous week /Current month / Previous month |
File format |
Select the format of the exported CDR. |
XLSX / XLSX (detailed) / CSV / CSV (detailed) / JSON / XML |
Compress if file size exceeds this value in MB (0 = always compress) |
Indicate a maximum acceptable file size (in MB); if the file exceeds this, it will be compressed to zip format before being sent as an attachment. If this value is set to 0, the report will always be compressed regardless of its size. |
Numeric |
Recipients |
In conjunction with or as an alternative to notifying the supervisors, you can specify an arbitrary number of recipients to which the exported Call Center CDR will be sent. |
Alphanumeric |
Carrying out tasks manually
Among the available actions for scheduled tasks there is the option to carry them out on demand without waiting for the set schedule. To start the task in the background you can click on the play icon.
At the end of the request, a message will notify you that task has started.
Audit Log
Description
The Audit Log contains all configuration changes made, tagged with the user who made the change.
Changes are not immediately irreversible, but it is possible to view what has been changed and, if necessary, go to restore it.
Knowing the user who made the changes is very important; the admin user is not the only one who can make configuration changes, but you can create customizable roles and assign users to these specific roles. In this way, you delegate part of the PBX configuration to customer staff. Then all changes made by the client will be marked with the user name assigned to them. Click on the link below for a more in-depth look at the users and roles users and roles
To reach the service, follow the menu path “Logs > Audit Log.”

The Audit Log contains change logs sorted by month, and it is possible to export the log in various formats: XLSX, CSV, JSON, XML There is a “Choose Columns” filter to target the search to specific sections present.
In fact, the Audit Log allows us to display:
Transaction Id
Day of the month: a specific date can be selected.
Timestamp
Username: name of the user who made the change.
IP address
Action
Entity type
Description

Auto-Provisioning
Description
The Auto Provisioning service generates the configuration file necessary for the correct operation of a device and transfers them to your phones. This file also contains information on the account and extension linked to the phone.
Configuration
This section collects all the configurations needed to perform auto-provisioning of a telephone device. You can also consult the list built-in devices for auto-provisioning:
Device list
This page contains the list of all devices for which provisioning file generation has been configured.
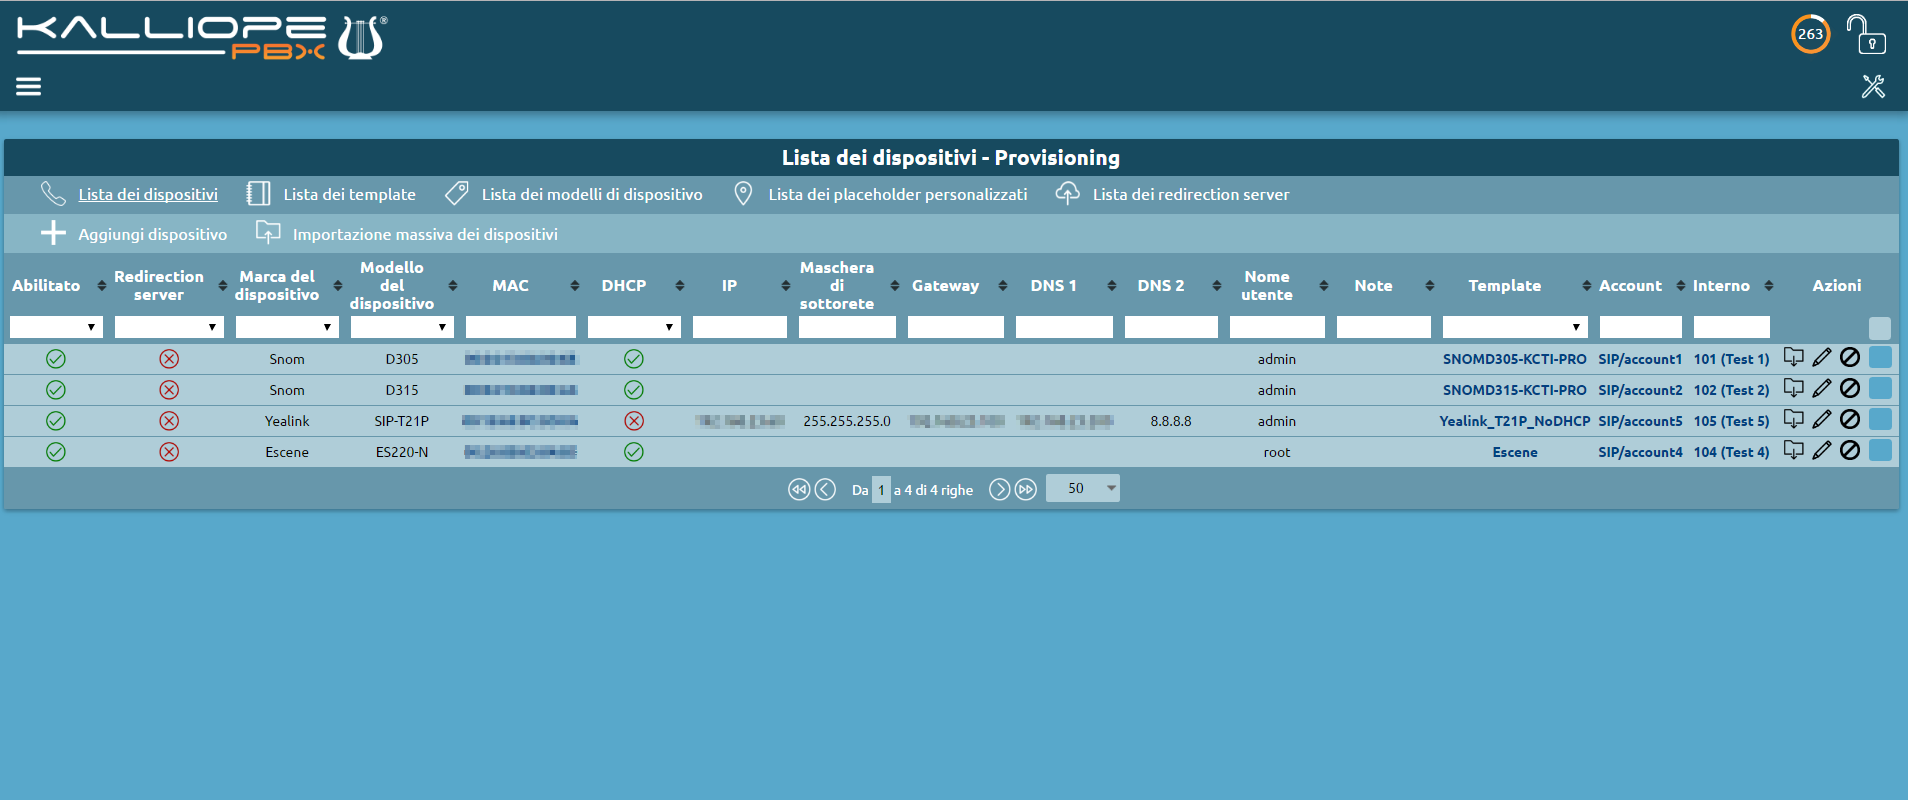
The following table lists the configurable parameters for each device.
Parameter |
Description |
Value |
|---|---|---|
Enabled |
Allows you to disable the generation of the provisioning file associated with the device |
Yes / No |
Device model
Parameter |
Description |
Value |
|---|---|---|
Brand |
List of manufacturers for which at least one device model has been defined |
Brand |
Model |
List of devices associated with the selected manufacturer |
Model |
Template |
List of templates associated with the selected template |
Template |
Redirection Server
Parameter |
Description |
Value |
|---|---|---|
Redirection Server for provisioning |
List of redirection servers defined for the selected manufacturer |
Redirection Server |
Provisioned on the redirection server |
Read-only field indicates whether the provisiong on the redirection server was successful |
Yes / No |
Device configuration
Parameter |
Description |
Value |
|---|---|---|
MAC Address |
MAC address of the device (formats that are accepted AABBCCDDEEFF, AA:BB:CC:DD:EE:FF, AA-BB-CC-DD-EE-FF) |
MAC Address |
Notes |
Free field containing annotations about the device |
String |
Enable DHCP |
Set the placeholder value %%IPADDRMODE%% to on/off for this device. The placeholder may be used in the template to generate the configuration file with the with the required network settings. |
Yes / No |
IP Address |
Set the placeholder value %%IPADDR%% for this device. The placeholder may be used in the template to generate the configuration file with the required network settings. |
IP Address |
Subnetwork mask |
Set the placeholder value %%IPNETMASK%% for this device. The placeholder may be used in the template to generate the configuration file with the required network settings. |
Subnet Mask |
Gateway |
Set the placeholder value %%IPGATEWAY%% for this device. The placeholder may be used in the template to generate the configuration file with the required network settings. |
IP Address |
DNS1 |
Set the placeholder value %%IPDNS1%% for this device. The placeholder may be used in the template to generate the configuration file with the required network settings. |
IP Address |
DNS2 |
Set the placeholder value %%IPDNS2%% for this device. he placeholder may be used in the template to generate the configuration file with the required network settings. |
IP Address |
Username |
Set the placeholder value %%PHONEUSERNAME%% for this device. The placeholder may be used in the template to set the phone login credentials. This same value will be used by KalliopePBX to drive the phone when a KalliopeCTI PRO application is associated with the device. |
String |
Password |
Set the placeholder value %%PHONEPASSWORD%% for this device. The placeholder may be used in the template to set the phone login credentials. This same value will be used by KalliopePBX to drive the phone when a KalliopeCTI PRO application is associated with the device. |
String |
Remote control
- If empty, the PBX will use the IP address from which the account associated with this device is registered at the SIP level
IP Address
Port
Same as the previous field, but related to the port on which the phone web interface is visible by the PBX.
Integer (range 1-65535)
Device user
- If the account is not associated the configuration file is not generated and the device is entered as Disabled.
Account
Template list
This page shows the list of templates on the KalliopePBX.
It is necessary to select a template for each phone model for which you wish to generate a provisioning file.
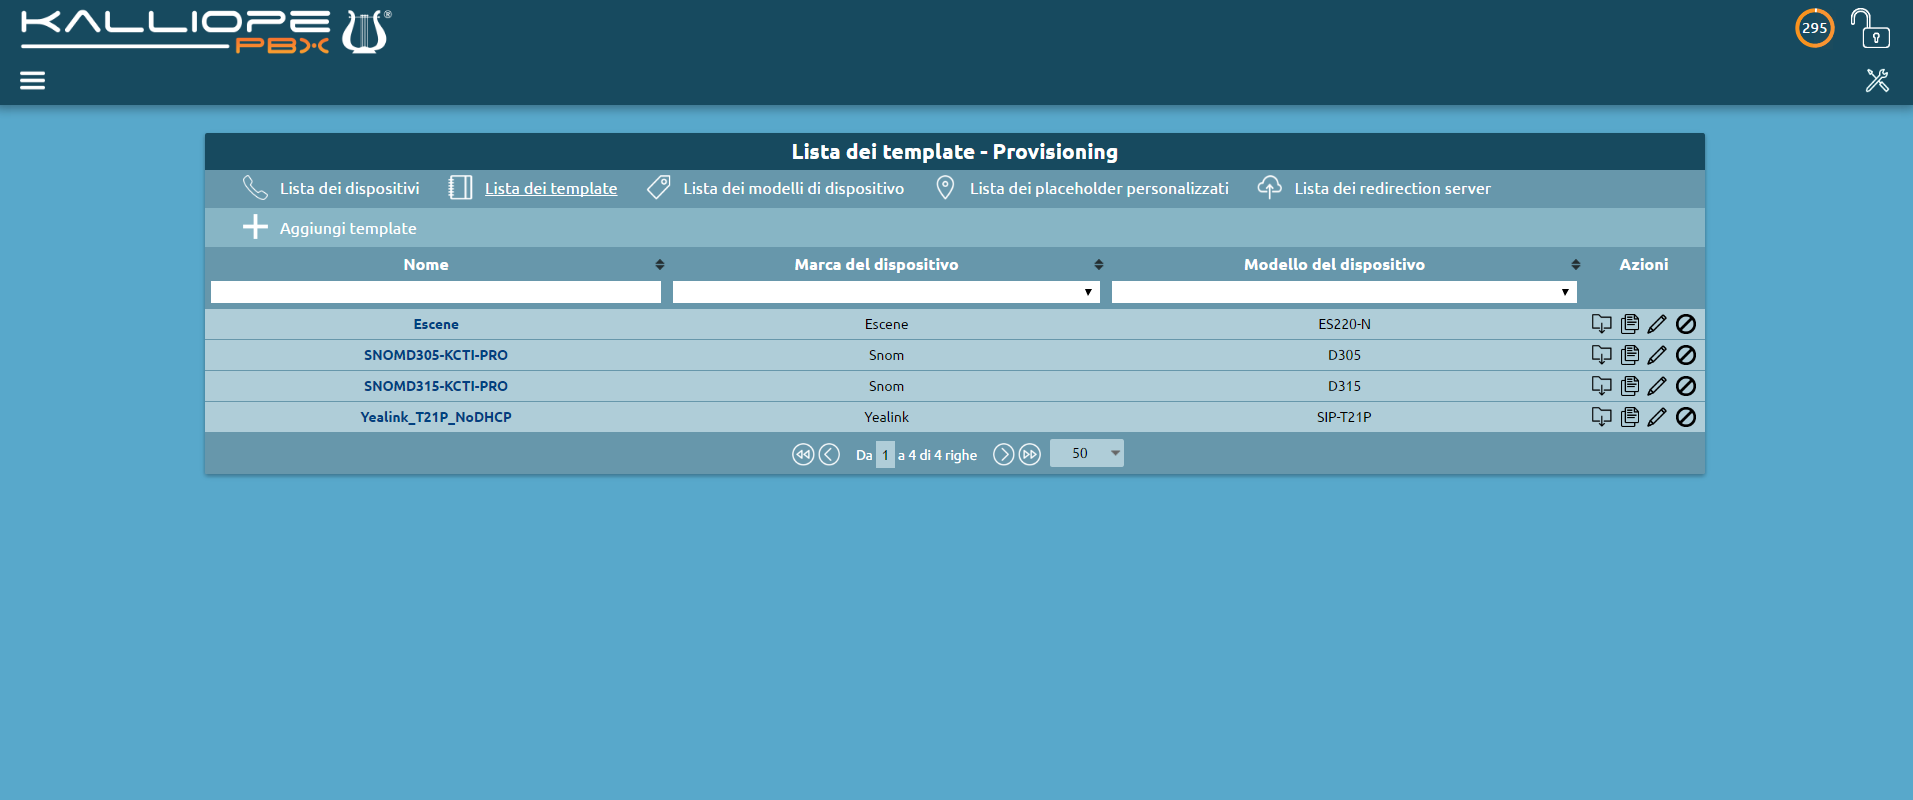
Parameter |
Description |
Value |
|---|---|---|
Name |
Template name |
String |
Device brand |
List of manufacturers for which at least one device model has been defined |
Brand |
Device model |
List of devices associated with the selected manufacturer |
Model |
Template content
Parameter |
Description |
Value |
|---|---|---|
Template |
This free field should contain the template to be used for generating the provisioning file |
Text |
List of device models
This page contains the list of all models defined on KalliopePBX. Some models are distributed with the KalliopePBX firmware, while more can be added in order to generate configuration files for models that are not explicitly supported.
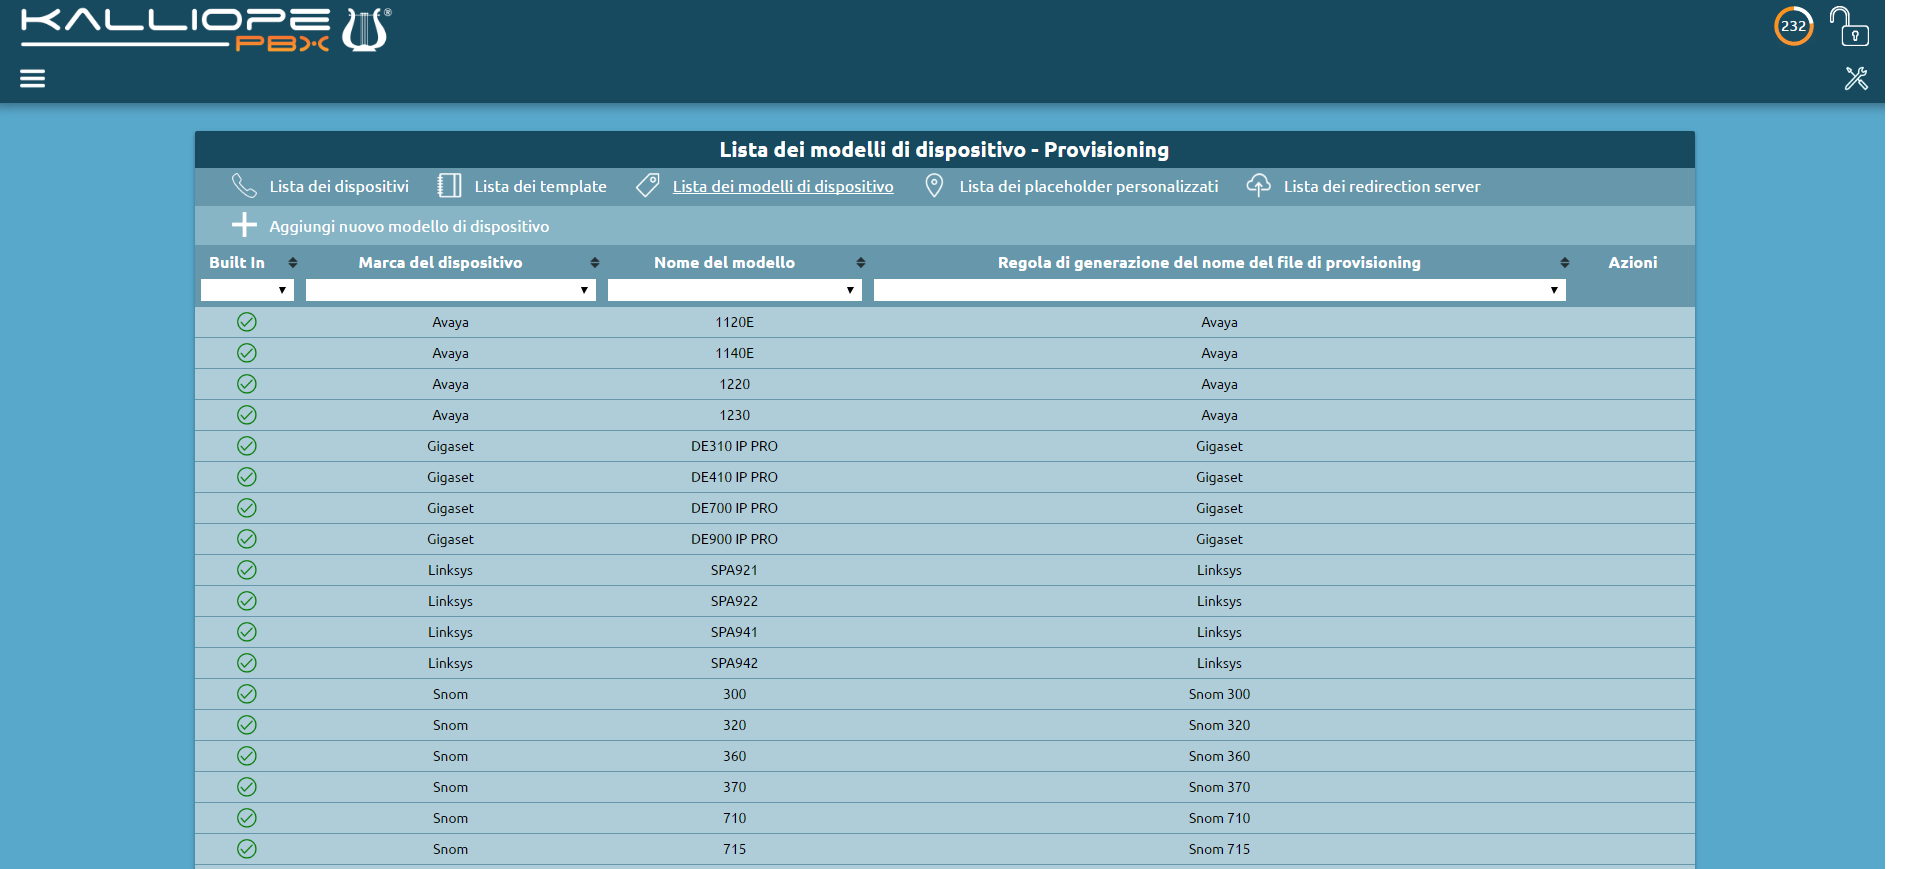
You can also specify rules to create provisioning files with arbitrary names. The filename can be composed of a prefix, a MAC address (in several formats) and a suffix.
The following table lists the configurable parameters for each model.
Parameter |
Description |
Value |
|---|---|---|
Name |
Device model name |
String |
Device brand
Parameter |
Description |
Value |
|---|---|---|
Choose Brand |
Allows you to select an existing brand or create a new one by selecting New Brand |
Brand |
Brand name |
In the case of New Brand contains the name to be associated with it |
String |
Name |
Device model name |
String |
Provisioning file name generation rule
Parameter |
Description |
Value |
|---|---|---|
Choose rule |
Allows you to select an existing rule or create a new one by selecting the New Rule item |
Brand |
Rule name |
In the case of New Rule contains the name to be associated |
String |
Prefix |
Prefix to add to file name |
String |
MAC address format |
Allows you to select the format of the MAC address to be included in the filename from a list |
MAC Address Format |
Suffix |
Suffix to be added to file name |
String |
Custom placeholder list
This page shows the list of all placeholders specified by the user along with the default ones. Custom placeholders are formatted as %%_PLACEHOLDER%% and can be used inside a template.
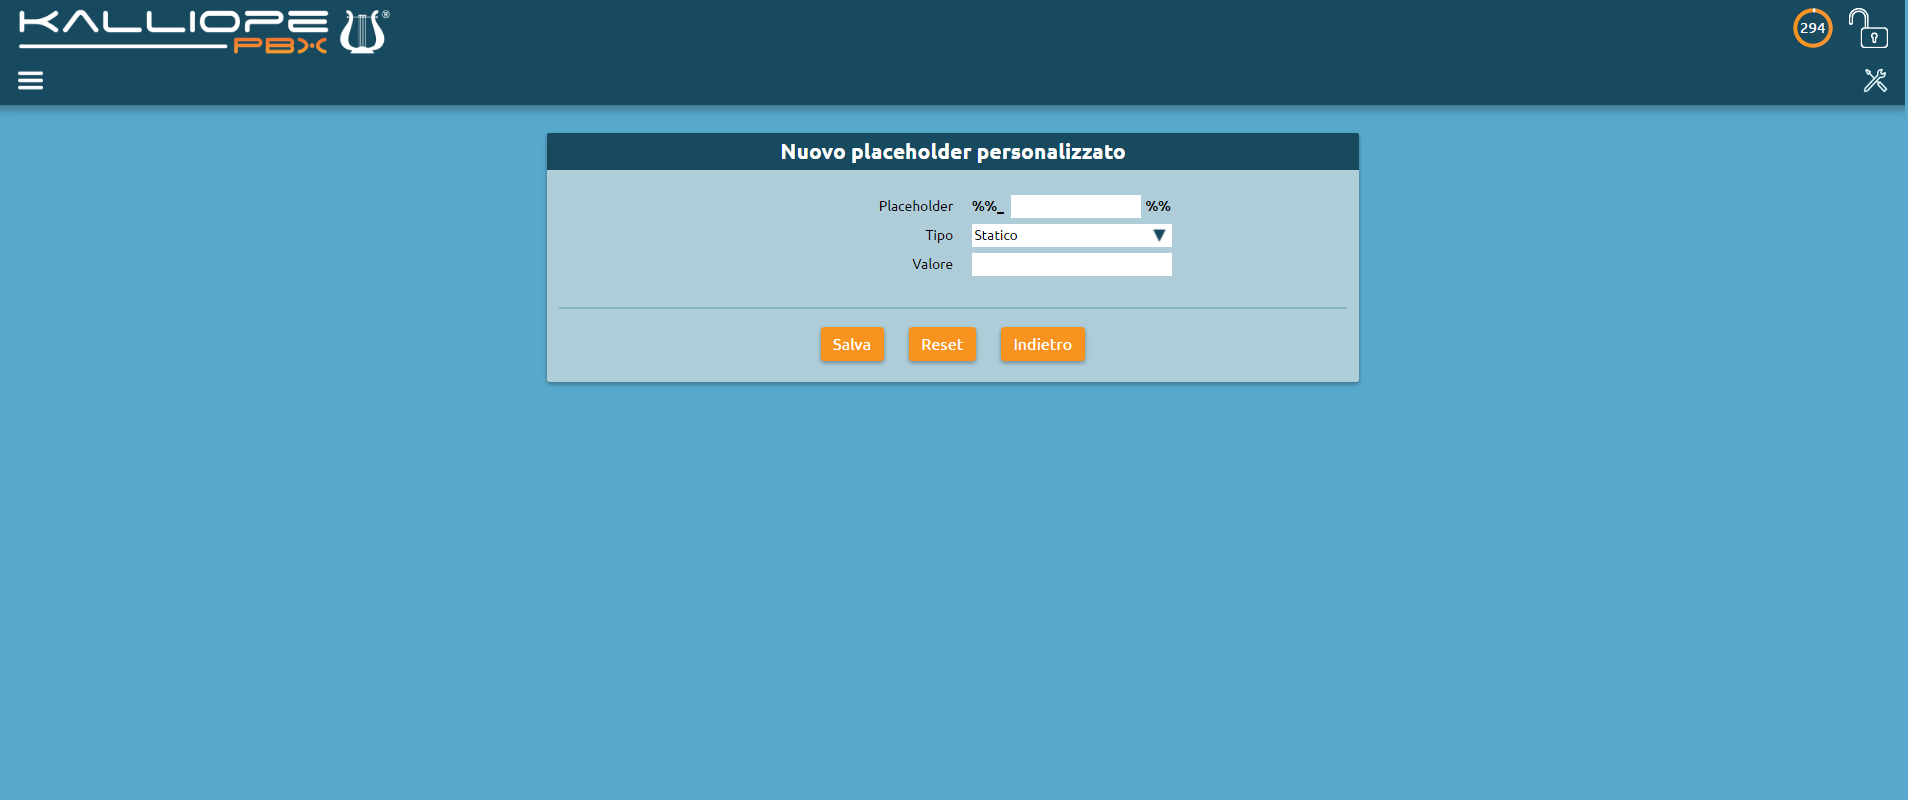
You can create two types of placeholder:
Static: used in order not to have to edit all templates which contain a specific value.
Dynamic: used to dynamically update certain values associated to the KalliopePBX and not the specific user. For the time being, the only available dynamic placeholders are the ones relating to the IP addresses associated to the different network interfaces/VLANs.
Parameter |
Description |
Value |
|---|---|---|
Placeholder |
Placeholder identifier. The placeholder to be used is %%_PLACEHOLDER%% |
String |
Type |
Allows you to define the type of placeholder |
Static/dynamic |
Value |
In the case of static placeholder the value to be replaced in generation is entered, in the case of dynamic placeholder the attribute of the KPBX to be used for replacement. |
String / KPBX Attribute |
List of redirection servers
This panel contains the list of all user-configured redirection servers on the KPBX. Currently, integration with redirection servers from the following manufacturers is supported:
SNOM (https://sraps.snom.com/)
Yealink (https://ymcs.yealink.com/)
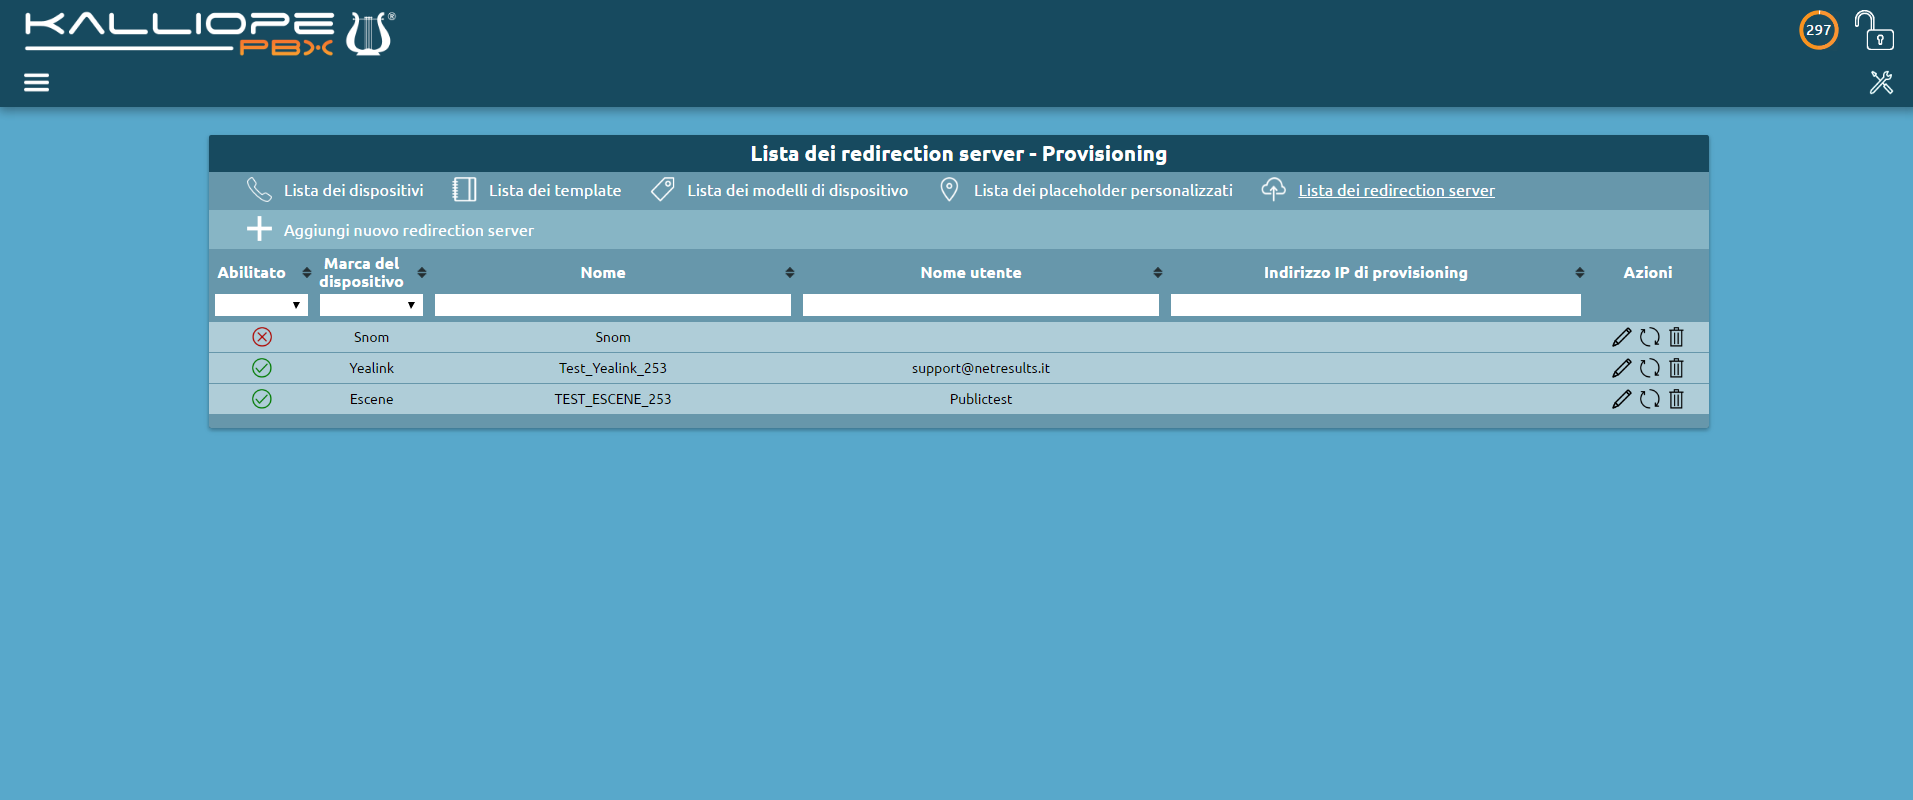
Note
Due to limitations of the APIs provided by Yealink/Escene, the configuration procedure is different when using the SNOM redirection server. Specifically, for Yealink/Escene, it is necessary to preemptively specify a server by accessing the RPS service web GUI. Its name will be referred to during the redirection server configuration phase.
Parameter |
Description |
Value |
|---|---|---|
Device brand |
Brand of the device for which the redirection server is being defined |
Snom / Yealink / Escene |
Credentials
Parameter |
Description |
Value |
|---|---|---|
Username |
User for authentication on the manufacturer’s RPS server |
String |
Password |
Password for authentication on the manufacturer’s RPS server |
String |
Settings
Parameter |
Description |
Value |
|---|---|---|
Enabled |
Allows you to disable the redirection server without losing its configuration |
Yes / No |
Name |
Name of the redirection server to be created (if SNOM) or to be used (in the case of Yealink / Escene) |
String |
Provisioning address |
In the case SNOM URL to which the redirection is made. (example: https://192.168.0.100/provisioning/ ) |
String |
Template
The configuration file for a specific device is generated from a template for the brand and model of the phone.
The template format depends on the brand and model of the phone as well as the version of its firmware.
When defining a template it is possible to use placeholders that Kalliope will automatically replace when generating the file.
These placeholders include:
KalliopePBX attributes (e.g. SIP UDP/TCP port of the PBX);
attributes of the extension/account linked to the phone (e.g. SIP credentials, first name, last name, etc.);
phone attributes (e.g. network parameters, access credentials, etc.).
Once the template has been defined, you must specify the MAC address of the device and the account/extensions you wish to link it to.
Once a file has been generated, it must be transferred to the phone. KalliopePBX provides the following file transfer protocols:
TFTP: files are available directly in the root of the TFTP server for single-tenant KalliopePBX. For multitenant KalliopePBX, you must add the Tenant UUID to the path (e.g. <tenant_uuid>/snom370-0004167898B1.htm).
HTTP / HTTPS: the files are published on http(s)://<ip_address>/provisioning/ for single-tenant KalliopePBX. For multitenant KalliopePBX, you must add the Tenant UUID to the path (e.g. http(s)://<ip_address>/provisioning/<tenant_uuid>/).
All generated files are also visible in the File Manager.
To tell the phone which protocol should be used to download the configuration file in addition to the IP address (and possible path) of the provisioning server, there are several modes whose configuration and execution order depend on the phone model used. The commonly available methods are as follows:
SIP PnP: the phone at startup sends a SIP SUBSCRIBE message to a multicast address. If on the KalliopePBX the SIP PnP service is enabled, the PBX responds with a SIP NOTIFY containing the TFTP server’s IP address to be used. This mode cannot be used in the case of multitenant KalliopePBX.
Redirection Server**: the phone at startup tries to contact the manufacturer’s Redirection Server. If the phone’s MAC Address is entered, the phone is redirected to the indicated server to download the configuration file. In this mode, you can use any available protocols (depending on the parameter configured on the redirection server).
DHCP OPTION 66: in the case when assigning the IP address, the DHCP Server also communicates to the phone the DHCP Option 66 containing the URL to be contacted (including the protocol to be used), the phone will use this information to make the download of the configuration file.
Manual: you can also start the configuration manually from the phone or the WEB GUI by entering the protocol to be used and the IP address (as well as the path, if necessary).
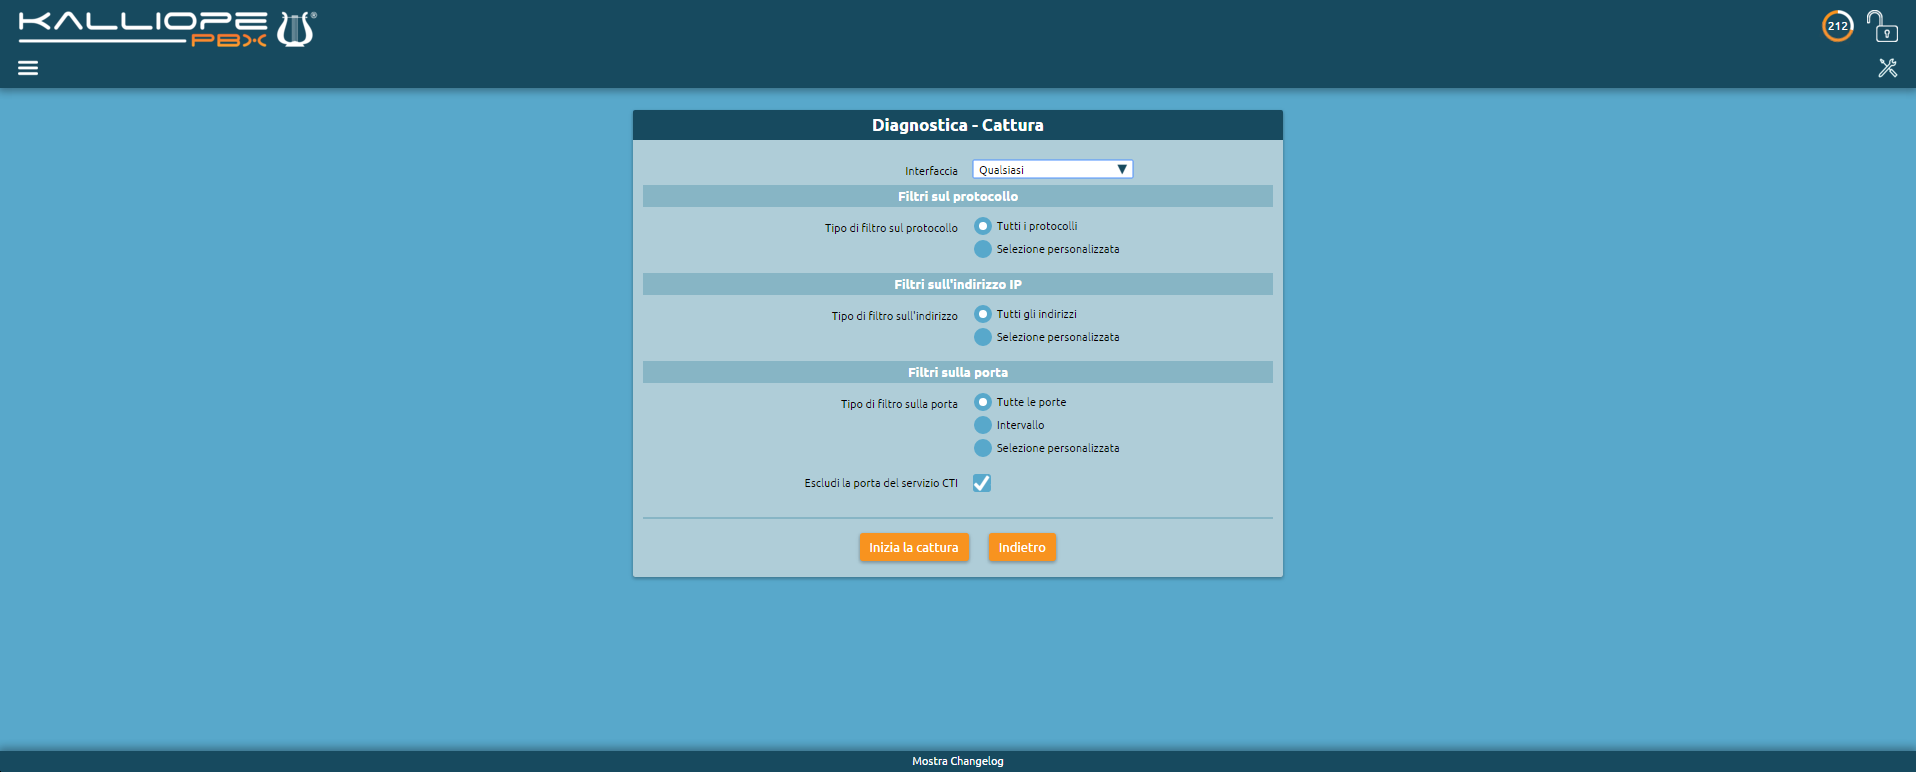
Packet Capture
he capture tool lets you acquire traces of packets to or from the KalliopePBX network interface, applying if necessary a selection filter based on:
Type of protocol (all or a combination of ICMP/UDP/TCP)
IP address (source or destination)
Source or destination port
Once you have set the desired filters, you simply need to click on Begin capture. You can end the procedure by clicking on Finish capture; otherwise the capture will end once the file size has reached 10 MB.
At the end of the capture, you can download the pcap file to your computer by clicking on Download or delete it by clicking Delete. Starting a new capture will overwrite the previous one. Rebooting the PBX will erase the pcap file.
Active Calls
Description
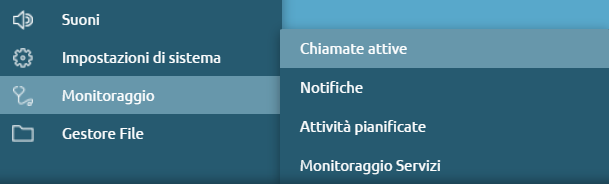
The “active calls” submenu of the Monitoring service can be reached by clicking on “Monitoring > Active Calls,” as shown in the image to the right.
The page shows the panel where the list of active calls is available, filtered by:
Source |
Destination |
|---|---|
Linked ID |
|
Channel |
Channel |
Status |
Status |
Caller ID |
Called ID |
Caller name |
Called name |
Called number |
|
Creation Time |
Creation Time |
Uptime |
Uptime |
Connection Time |
Connection Time |
Uptime since connection |
Uptime since connection |

PBX Events
Description
The PBX Events page displays all notifications about events that occur when the central unit is accessed.
To reach the service, follow the path “Logs > PBX Events”.
ID
Event type
Day of the month
Timestamp
Severity
Parameters
You can also export data in the following formats:
XLSX
CSV
JSON
XML

Remote Filesystem Management
Description
To reach the service, follow the path “System Settings > Remote Filesystem Management”.

The following page contains the list of remote filesystem on any remote computer.
Configuration
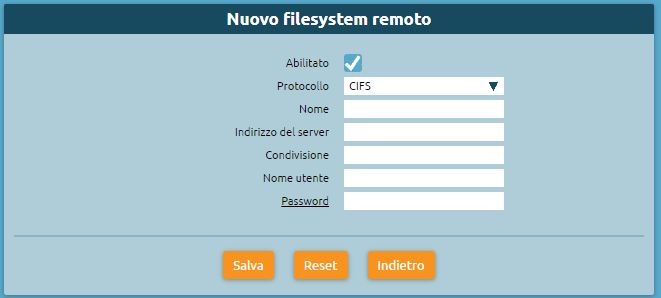
To add a filesystem, press on “Add new remote filesystem” The configuration of the new filesystem allows you to enter:
Protocol (CIFS/NFS)
Name
Server address
Sharing
Username
Password
Tenant Management
Description
On the tenants management page, you can view the list of tenants and tenant groups.
Configuration
To reach the “Tenants Management” service, click on “System Settings > Tenants Management”.

Unlocking the padlock in the upper right to enter edit mode, you can create a new tenant.

Tenants list
To create a new tenant, it is necessary to click on “Create New Tenant.” There are the following fields to fill in and/or select:
Operating mode: can be full, limited with outgoing call blocking (except calls to whitelist numbers) and disabled (operation of that particular tenant is inhibited)
Name
Domain: domain name that works as the username component after the “@” (e.g., admin@domain)
Password: of the tenant admin that can be initialized at tenant creation
Custom logo url: a tenant user that enters the central web interface can see a custom logo in the top left corner
Admin email: email of the referrer for sending the tenant creation notification
Group (default group / new group): is useful for grouping multiple administratively distinct tenants (each with its admin) into a confederation
The configuration of tenant groups is explained in the next section.
SIP account prefix: ensures uniqueness of SIP accounts, i.e., all SIP accounts of a given tenant will have the same prefix
To prevent a collision (two tenant admins creating the same SIP account), each tenant is assigned a prefix (a 6-character alphanumeric string) so that all SIP accounts of a particular tenant share the same prefix. The prefix characters are randomly generated, but it is possible to customize them.
Note
This is the main difference between the default tenant (the one that is prefixed on the central machine) and the others. The former, which comes from a monotenant device, has accounts that lack prefixes.
For example: if you have account x, defined in the default tenant, to continue using it, you either reconfigure your phone to assign a prefix to the default tenant or risk keeping the account without a prefix.
Accountlimit (-1 is unlimited)
Exten limit (-1 is unlimited)
Call limit (-1 is unlimited): affects the limit of external calls
Local storage quota (in MB): internal machine storage quota that the tenant can use to record custom audio files or voicemail messages
Provisioning fallback enabled
Once configured, you can access your tenant of which you are an administrator.
Tenant groups list

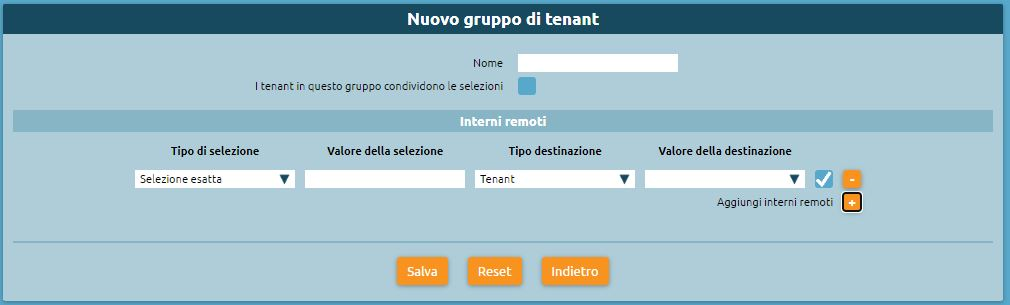
In this section, a new tenant group can be created or modified. The tenant group is then used to group multiple tenants from multiple virtual pbxs – administratively distinct – into one group. Then it is possible, after putting them in the same group, to share the numbering plan and have the tenants communicate directly between extensions.
Name: name of the group of tenants.
Tenants in group share selections: checkable or uncheckable option.
Tenants belonging to this group: list of tenants belonging to that particular group.
Remote extensions
In the numbering plan, the set selections that are served by the selected tenant are defined under the “remote extensions” section.
Selection type (exact selection, selection interval, prefix selection).
Selection value
Destination type
Destination value
Site Management
Description
Sites can be configured at the PBX admin level. A site is defined by the IP addresses of the phone that belong to a particular site.
Configuration
To configure the site management service, you can follow the path “System Settings > Site Management”

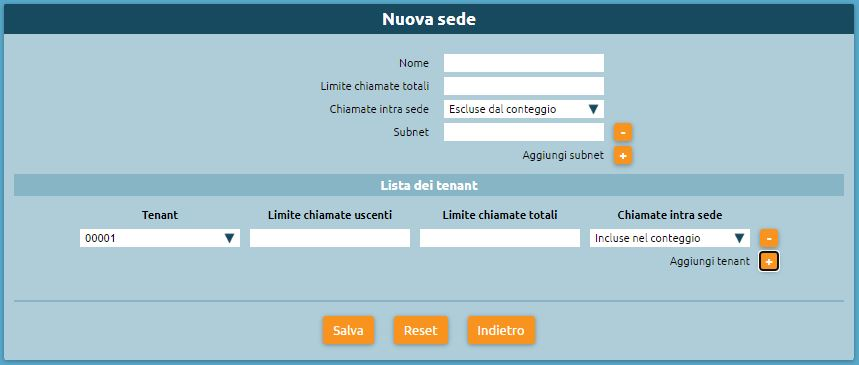
To create a new location click on “Create New Site” The form must be filled with the following information:
Name: name of the venue
Total call limit: maximum number of total calls that are allowed on this venue
Intra site calls: can be excluded from count/included in the count
Subnets: registration ip of the phone that belongs to a particular venue
In the total call count, there are calls from telephones that go outside or to services at the central office, or to a responder, etc. It is then necessary to inform the PBX office whether any call between two extensions at this location should be charged in the count of calls that occupy the stream or not. This depends on the communication between the telephones, whether they communicate in direct media or not. If a call between two phones in the same location is not in direct media, it occupies two streams within connectivity.
As for intra site calls, if you are not sure whether direct media is applied on all internal calls, you will have to include them in the count. On the other hand, if the intra site calls work in direct media, you can exclude them from the count.
Note
Intra-office calls are different from inter-office calls. With “Excluded from count” intra site calls will go into direct media.
Example of a specific case: In the case where multiple tenants physically insist behind the same access connectivity, the telephones of the various tenants will show up at the exchange with the same IP. One can then partition this capacity to divide it among the various tenants insisting on a given location. In the simple case there will be a single tenant for which you assign:
Tenant
Outgoing call limit: a number that must be less than the total call limit and represents the maximum number that will be engaged by external calls
Total call limit (insisting on the premises)
Intra-tenant calls
Audiofile management
Description
The Audio File Management service includes the uploading and customization of audio files to be performed during the delivery of specific services.
Audio File Configuration
Following the path Sounds > Audio Files, we’ll be on the page that lists the audio files present on the control unit and for each you can customize:
- Play:
Play in browser: the file is played directly in the browser
Download: the file is downloaded locally
Play on a device: you can choose which extension and which account to play it on. Pressing “Play” the selected extension will ring and you can listen to the audio file through the handset.
- Replay:
Load a new audio file: you can select it locally
Record a new audio file: you can record a new audio file using a telephone terminal. You can choose the extension and the account on which you will be called by the central unit that will provide you with instructions for the correct recording of the file
Delete audio files we don’t need anymore
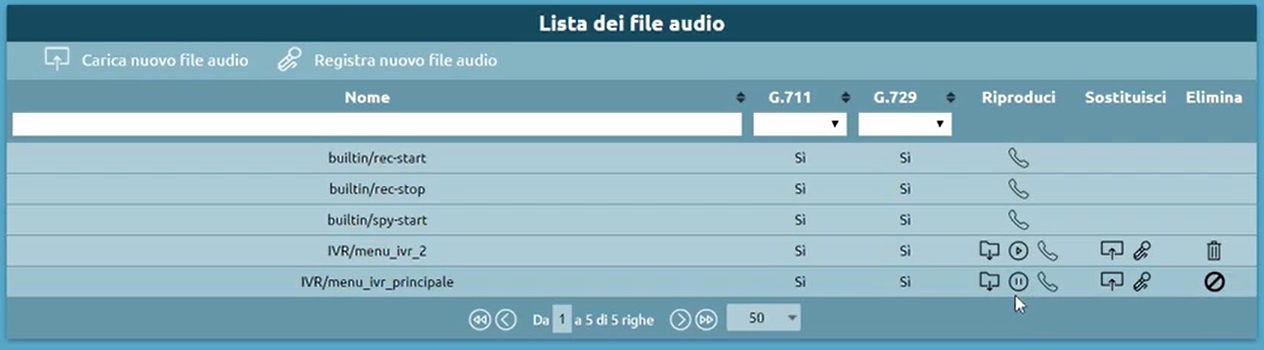
The first three files we see are builtin, i.e. files made available to the control unit:
builtin/rec-start: warning file of the start of recording, in case of audio recording of phone calls is enabled
builtin/rec-stop: notifies the end of the recording of phone call audio
builtin/spu-start: audio message that notifies a call center operator (if the license is active) that a supervisor is starting to listen passively to that call
Upload new audio file
You can load a new audio file
Available destination path: the path is a folder that allows you to identify file types more easily
New destination path: you can insert the new path
File: you can choose an audio file (.wav and .mp3)
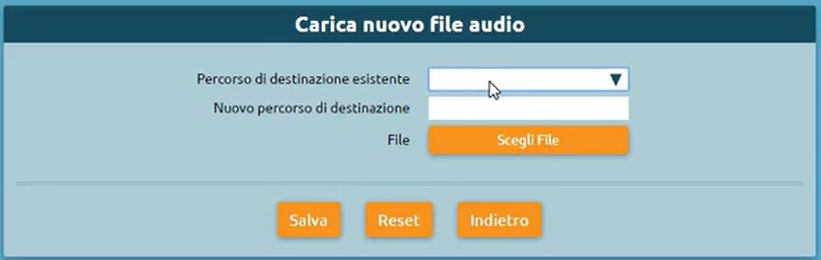
The files will be available in the “Audio file list”.
Record new sound file
File name
Available destination path
New destination path
Recording device: internal and account to be used for recording the audio file.
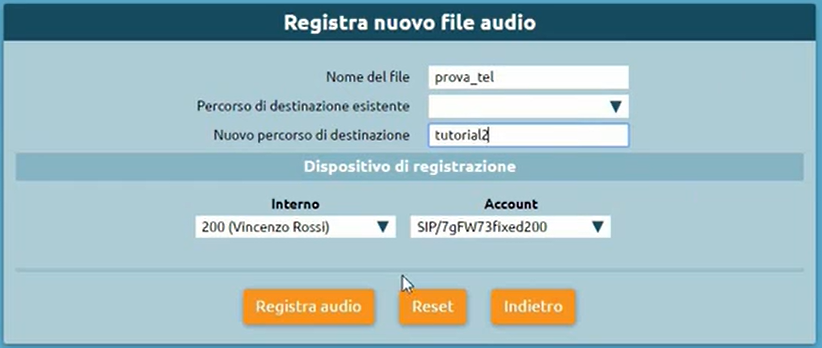
File size limit cannot exceed 5MB in size.
Music On Hold Classes Configuration
To configure the MOH classes we proceed by going to Sounds > Music on Hold Classes.

Hold music is the playback of audio files used for many services, including queues or during call transfers from one extension to another. The central unit has five pre-configured hold music classes available, but you can create an arbitrary number of new hold music classes.
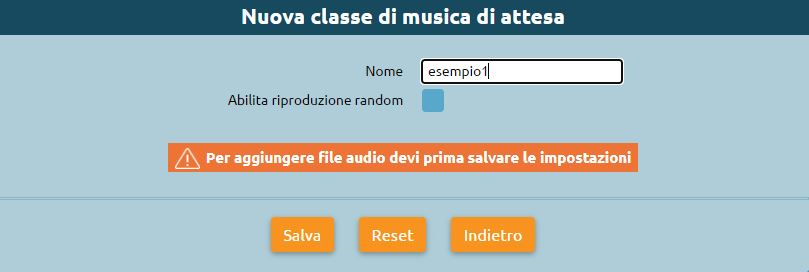
New MOH class
Name
Random Enabled: option to randomly play the audio files in the playlist, which would otherwise be played from top to bottom.

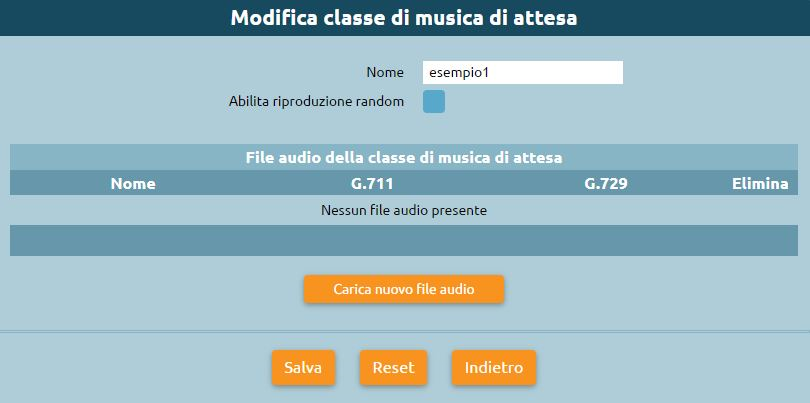
Edit MOH class
Upload new audio files: you can load a series of audio files
Audio Settings Configuration
To configure the Audio settings we proceed by going to Sounds > Audio Settings.

System Audio File Lang: you can change the language
Default MOH Class: you can view the list of preloaded playlists or that we will add later
Spy service Sound File: indicates the choice of the audio file to be used by default for the passive listening service

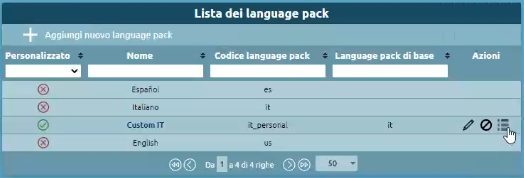
Custom Languages Configuratione
The “Custom Languages” function is available for the Singletenant Admin and Multitenant PBX Admin.
To get to the service, press “Sounds > Custom Languages”.
In this panel, variants can be defined from a front audio base in a given language.
In the customization tab you can enter:
Name
Basic language pack
Variant
At the audio settings level, you can choose a custom language that inherits all the audio prompts of the base language you have chosen. Clicking on the list of the custom language created shows all the audio files that make up the language pack of the selected base language. You can change the speaker or alter the content of the files by uploading an audio file to replace the standard one. Anything that is not returned is inherited from the chosen primary language.
Load archive with audio files
You can upload a zipper containing the audio files, they are automatically reallocated over the previous ones.
SIP settings
Description
The SIP settings panel contains the specification of telephone engine settings. The SIP protocol governs the communication between the exchange and the telephones and between the exchange and other gateways.
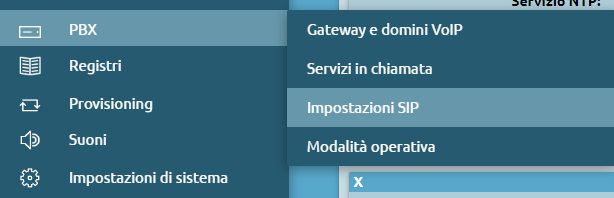
Configuration
The panel can be reached from the menu “PBX > SIP settings”. In the case of a multitenant system, the panel is used by the PBX admin because even in a multitenant node, the SIP stack running on the machine is unique and shares settings among all tenants. The tenants, however, can independently perform the configuration of their own extensions/groups/queues/accounts.
Enable pedantic check of SIP messages: this causes a stricter check of the formal correctness of SIP messages sent to the pbx to be carried out, and if this legal check indicates malformations within the SIP packet, it discards it. This is a security measure to prevent malformed SIP packets from arriving at the exchange, creating malfunctions or attacks on the machine itself. In cases where one interfaces with providers (gateways, telephones) that create SIP messages that are not formatted entirely correctly, it may be helpful to disable the flag. In this case, message parsing is relaxed and made acceptable.
- DTMF mode: tones that can be sent during a telephone call to send commands or information to the other party. There are three modes provided in the SIP standard by which DTMFs sent by the other party or sent to the other party can be sent and acknowledged.
RFC 2833: can be considered side-by-side with 4733, which recalls and extends 2833.
This mode provides that DTMF tones are sent as RTP event packets within the RTP stream of a call. DTMF tones take the same path as the audio stream, but are not sent as tones, but as RTP event packets. These RTP event messages are sent by sending an initial packet (beginning of the tone). Then, with periodicity typical of VoIP, another packet is sent that lengthens the duration of the tone. These RTP event’ messages contain the number of keys pressed and the symbols *#.
Example:
The DTMF tone sent in RFC 2833 mode by the 10.0.20.100 central unit to the PBX can be displayed:
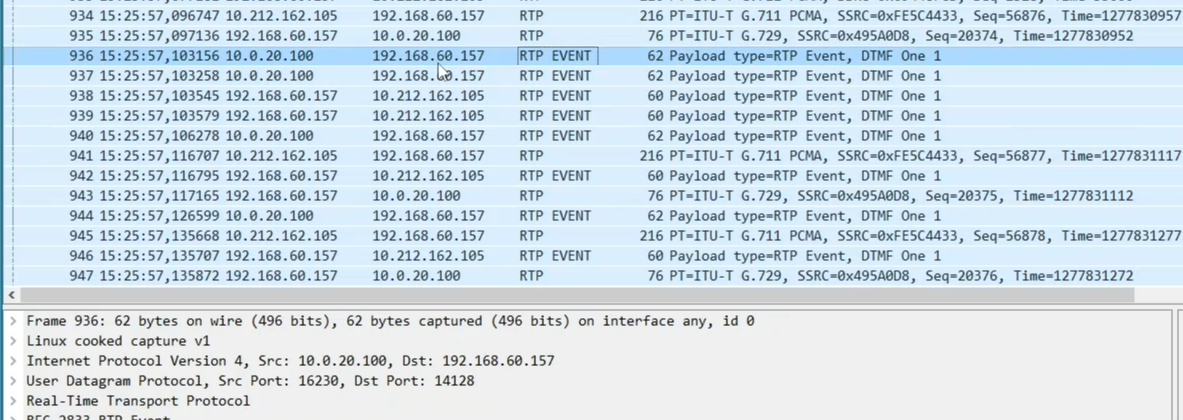
This incoming RTP is passed back from the pbx to the interlocutor.
The audio packet is sent to a stream that has a source and destination port that contains the RTP stream. When the station sends a DTMF in RTP event mode within the same stream, the port extremes do not change (the same as in the audio packet), but the payload type changes.
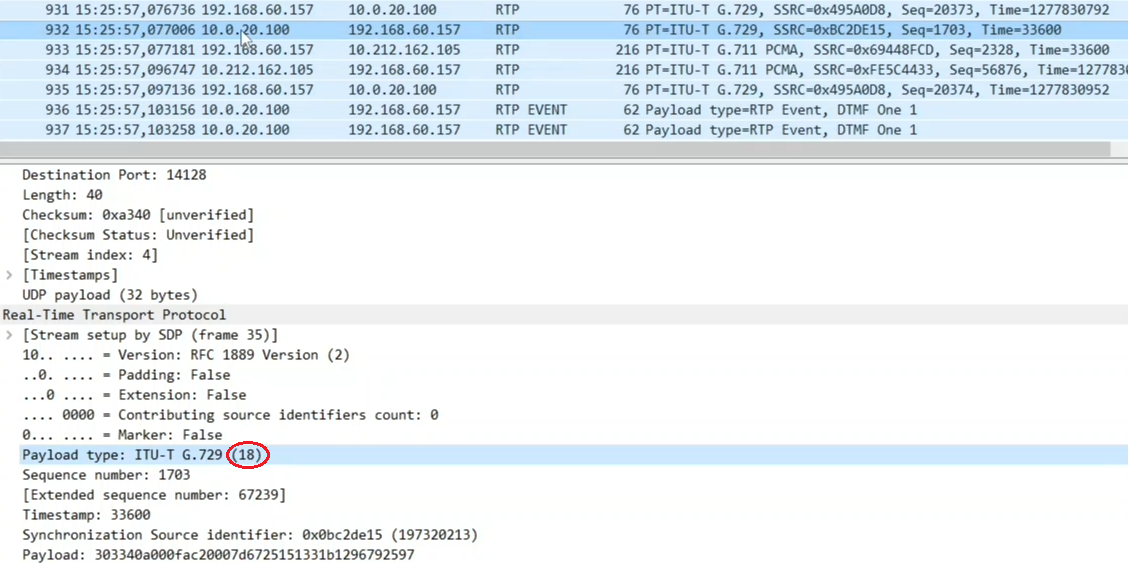
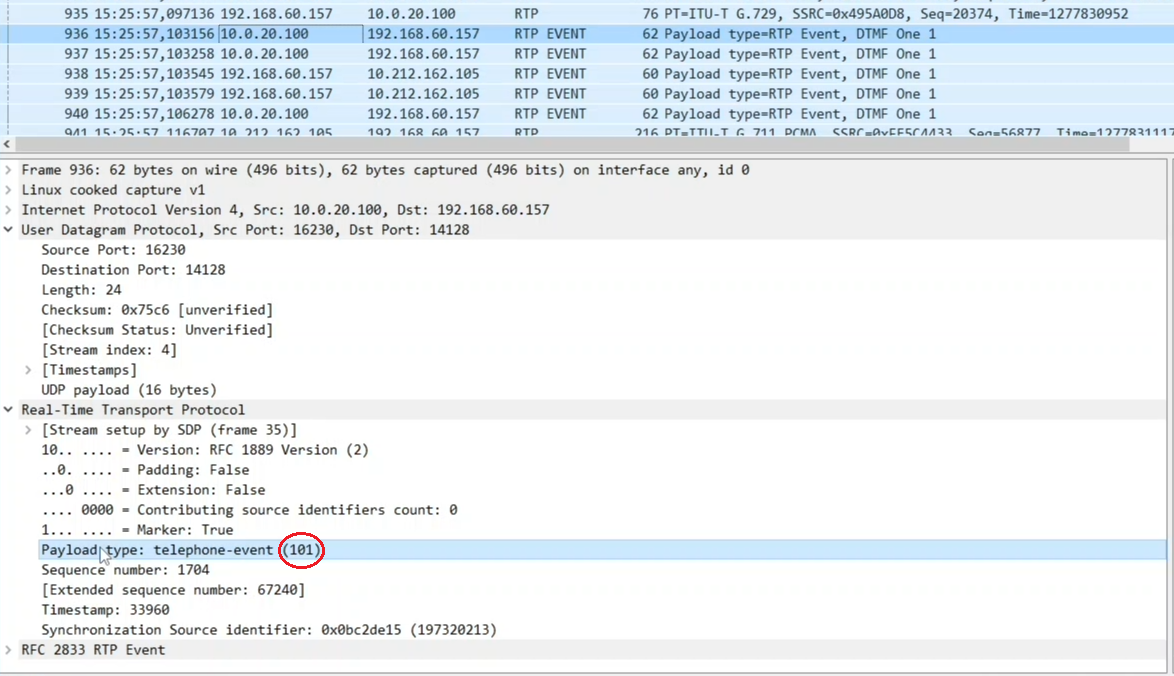
In the second case the payload type is 101 because the RTP event changes the payload type. Kalliope uses 101 by default for sending DTMFs.
The payload becomes explicit information of the key is pressed, the volume, and duration in samples.
UDP, in the case of a PBX with more than one network interface, causes VoIP service to be activated on all the interfaces in the PBX. A second network interface can be added, or VLAN tags can be added.
.png)
The duration is useful because if the central unit has to convert this DTMF, when sending it to the interlocutor in a format other than RFC 233, it should play it back for a corresponding duration. The setting in this panel applies to all SIP accounts defined in the “Internal and Accounts” panel and is used as the default setting for all incoming and outgoing lines.
Unlike accounts, in the panel, there is no ability to go and change DTMFs: when you send a DTMF to an account, you send it with SIP settings, and the same occurs when a SIP account sends a DTMF. Instead, you can change the DTMF mode in the Inbound lines panel or leave it as default.

This mode is often referred to as AVB (Attribute Value Pair) on other equipment.
SIP INFO: is a mode that does not send RTP or RTP event messages, but an info type SIP message. The info is a type of SIP message that contains a payload containing the key and duration, is transmitted only once, and has a network path that follows that of the SIP signaling which is different from the path that the RTP flow takes.
In-band: typed DTMF tones are sent as audio tones within the RTP stream.
If you analyze the tracks containing DTMF tones, you can find RTP only. So you cannot distinguish whether they are tones or not. The problem with DTMF transmission under audio tones is that if codecs other than G.711 are used, they introduce compression into the audio and distortion of the tones. While a conversation is understandable, recognition of these tones may fail.
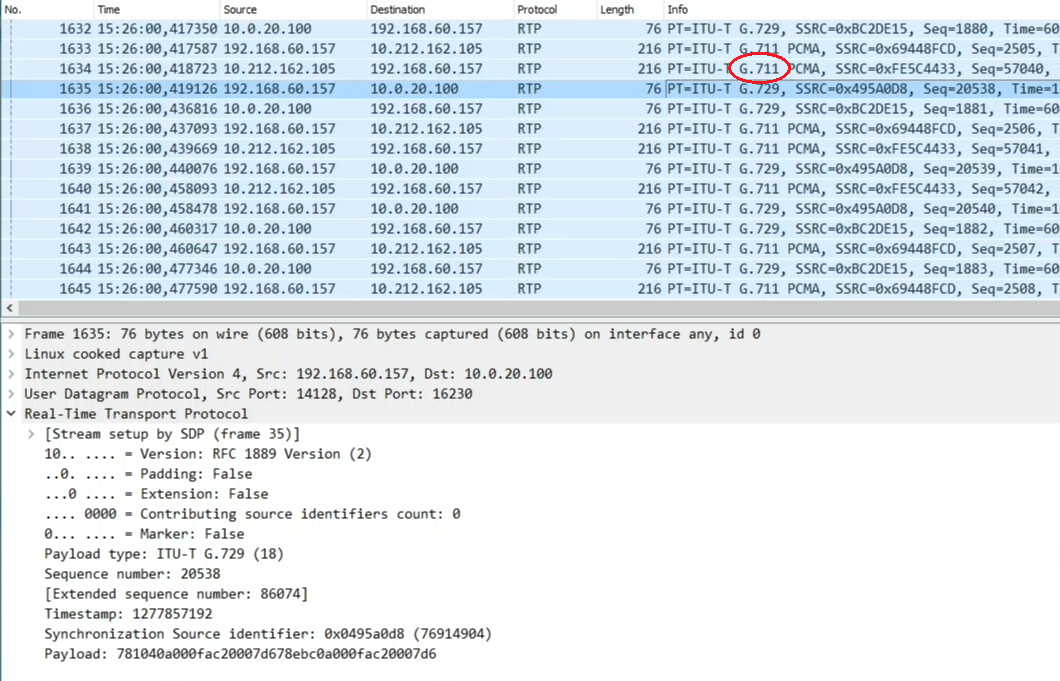
Thus, the use of in-band DTMF mode is discouraged because if the RTP stream suffers degradation due to losses or congestion, the tones, even using G.711 are distorted and may not be recognized. Thus, the use of DTMF in audio is recommended only in conjunction with a compressed PCM a-low or PCM u-low codec, but it may still be error-prone.
The most commonly used mode is RFC 2833.
The following two fields are attributes that impact both SIP accounts and input and output lines; as in the case of DTMF mode, the next two are also modifiable from the default value in the input and output lines.
Enable RPID (Remote Party ID) acceptance: enables COLP acceptance (named thus in the inbound and outbound lines).
Enabling causes it to extract the caller’s identity from the FROM it sends and the PAI, RPID, etc. headers. This is a SIP header that carries additional information that identifies the caller. During a call, there are instances when the identifier of the person being talked to may change over time. The COLP feature causes the exchange to notify that the caller has changed; there are some cases where it is necessary to provide this information to the caller, and others where it is not. This flag causes it to accept from telephones connected to the exchange, the caller ID present in the RPID or PAI (P-Asserted-Identity) header.
Note
At the output level, it is recommended that the entry be disabled since you do not want the pbx to change the identifier of the connected line.
Send rpid mode: Send COLP mode (named so in the input and output lines).
It has three options: disabled / remote party ID / P-Asserted-Identity. In this case, the setting that is used for telephones and that is recommended is sending PAI. This flag causes the pbx to warn that the interlocutor being communicated with has changed, it sends a message that updates the information via the PAI header. The interlocutor change information is useful toward telephones, but generally, on an outgoing line it should be disabled.
Note
If you go to make a trunk to another exchange where you configure remote extensions, in this case the line is not an outgoing trunk to an operator, but it is the interconnection to another exchange on which it is helpful to activate the COLP update mode.
The following three fields set the quality-of-service parameters for the service leaving the exchange. There are TOS hexadecimal values and priority codes in the network to decide which packets to make travel with priority over others in case of congestion. Thus, it ensures that audio and video streams receive priority over sending the mail.
TOS SIP
TOS Audio
TOS Video
These values can be changed if the network in which the control panel is operating requires that different TOS values be used for audio, signaling, and/or video.
Enable Video: to globally enable support for video calls.
Maximum bitrate for video calls: attribute that applies only to video calls and determines the maximum bitrate that the exchange accepts and offers for video calls, by default it is 384 Kbps so as not to take up too much bandwidth. Often values can be raised to increase quality.
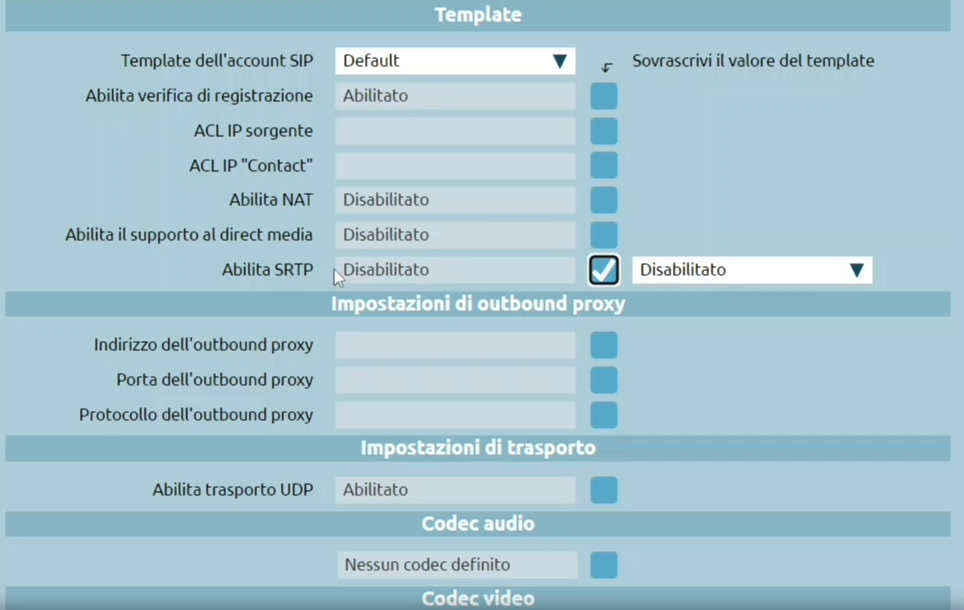
Enable RTP encryption support (SRTP): enables at the pbx level the ability to allow encryption of RTP streams that generally travel in the clear (anyone who can intercept the RTP stream of the call can listen to its contents).
SRPT is a protocol that relies on the prior exchange of keys between the caller and called party; the flow is encrypted with a symmetric key cipher. The key is exchanged during call setup, and if a secure signaling transport protocol such as TLS is not used and TCP or UDP is used instead, it can be read in the cleartext on the SIP message. Enabling SRPT makes sense if coupled with a secure signaling protocol such as TLS.
Warning
Enabling SRTP in the SIP settings does not automatically enable the actual use of SRTP, but it does allow the module from SRPT support. You need to enable it in the Extensions and Accounts panel. Here, there is a checkmark “Enable SRPT”: this way it can be inherited by all accounts that use that particular template.
The following two fields are not necessary to configure, except when you want to expose the service via WebRtc (via Web Socket) and specify a STUN server to acquire the information needed to shut down signaling properly and media.
Note
STUN is a protocol used to distribute the public IP information a client uses behind a NAT. It is used by rtc (web phone) web clients to ensure that the central station knows what IP address to send media streams. It goes hand in hand with enabling transport (protocol for SIP signaling) via Web Socket. Once Secure Web Socket is allowed, there is a need to specify a STUN server, which the central office uses to learn which ports it will use for signaling and media.
STUN server address
STUN server mail
NAT Helper
This section is especially important for making the station available in access from the public.
External host: public IP address.
External host update period (sec.)
External UDP port
External TCP port
External TLS port
Local networks
All messages sent to networks marked as local use their private address as routed, while what is outside local networks uses the IP address you specify in the external host.
Predefined video codecs
To enable video call support, check the above “Enable video” box and select which video codecs are supported by the central unit.
Codec audio
Also, for audio, you can select which codecs are supported by the power plants.
SSL Settings
Description
The SSL (Secure Sockets Layer) settings section contains the management of trusted CAs (Certification Authorities).
Configuration
To reach the SSL settings section you can follow the path “System settings > SSL Settings” as shown in the right figure.

Trusted CA Management
This section contains the list of Certification Authorities of phone vendors that the pbx considers valid to authenticate a client certificate.
The server certificate is rarely issued directly from one of the CAs on the phone, since they are no-root CAs. Often certificates are issued by intermediate CAs.
Note
It is important to remember the correct sequence of the chain: root CA > intermediate CA > server certificates
The root CA issues a certificate to an intermediate CA and the intermediate CA issues the server certificates. You have to upload the server certificate consisting of the actual certificate and private key and the intermediate CAs that are used to build the chain of trust up to the root CA.
The certificates must be put together inside a single .pem file. The phone then provides the client certificate, the certificate is validated by the pbx using the trusted CAs in the panel.
If the certificate is deemed valid and both the CN (common name) and MAC address match the file it is requesting, then everything matches, the session closes, and the download of the provisioning file can start.
While on browsers intermediate CAs are often preloaded, on phones, for reasons of memory occupancy there are only root CAs. If we load the server certificate signed by an intermediate (signed by a root CA) on the machine, but the server passes only its own certificate and not the intermediate one to the phone, it is not considered valid by the phone.
It is then necessary to upload both the intermediate CA and the server certificate.
Server certificate management
In this section you can upload the server certificate in a single .pem file.
By default, on all Kalliope, there is a self-assigned certificate that is issued by a self-generated, in-house CA.
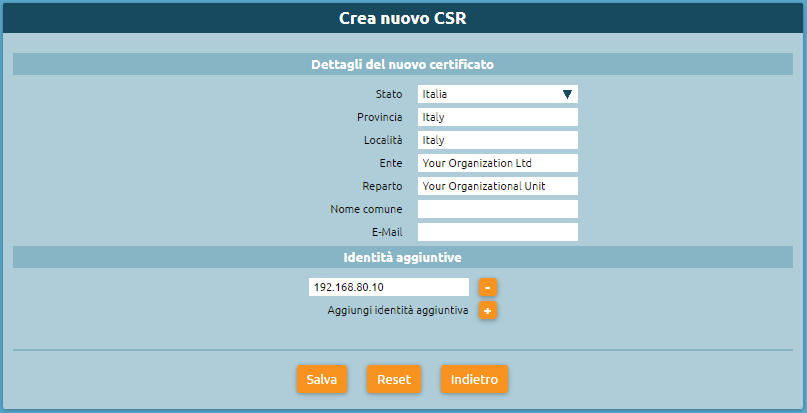
You can create a new CSR certificate (Certificate Signing Request) by clicking on “Create new CSR” and entering:
the details of the new certificate:
Country
State
Locality
Organization
Organizational unit
Common name
E-mail
Local CA Management
In this section you can observe the Root Certificate Details and the Certificates List.
It is also possible to:
Emit new certificate, insert new certificate details and Subject Alternative Names:
nstall as server certificate
Country
State
Locality
Organization
Organizational unit
Common name
E-mail
Download root certificate (.pem)
Download root certificate (.der)
Delete local CA
Forward On All Unreachable
Note
Information
Firmware: 4.5.9 or later
Available in single-tenant and multi-tenant (tenant admin level) systems
Description
This service lets you specify a destination to which inbound calls to the PBX (or the tenant in multi-tenant systems) should be forwarded when all SIP accound linked to the extensions are unreachable.
This service is particularly useful when the PBX is remotely installed with respect to the terminals (for example, when it is installed in a remote deta center while the telephones are located in the client’s offices); should the client’s offices be cut off from the from the PBX, all inbound calls can be forwarded to a backup destination, such as a mobile number or a courtesy message.
In multi-tenant systems, the service and its destination can be activated independently for each tenant by the tenant admin.
Configuration
The service can be configured in the PBX -> General Settings page, under the “Behavior when all accounts are not registered” section.
Other than the checkbox for activating the system, there is a form in which you can select the forward action, as well as specify an audio file to play to the caller if desired and the action to perform on the inbound call (selectable from a drop-down menu). If you wich to forward calls to an extrernal number (to reach during an emergency), you will nedd to specify the destination number, without any external line selection prefix, the identity (which will determine the calling number), and the class that KalliopePBX will use to make the call.
Interfacing with third party software via AMI
Descrizione del servizio
The Asterisk Manager Interface lets KalliopepBX interface with third party software. This panel lets you define the authentication credentials (username and password) along with an ACL comprised of one or more IP addresses or subnets. The configured user has read permissions for “call” and write permissions for “call,originate”.
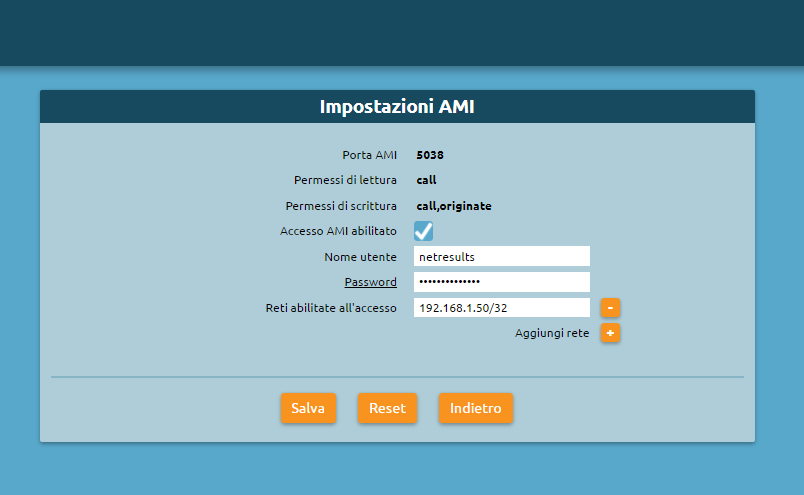
Configuration
By enabling the AMI interface from the Kalliope GUI, you can interface with external systems to carry out click-to-call operations.
The standard syntax to carry out c2c via AMI (from the extension %extension% towards the destination %toNum%, including the outbound prefix for external numbers) on KalliopePBXv4 is the following, in which some channel variables are set:
Action: Originate
Async: true
Channel: Local/%interno%@c2c
Context: from_c2c
Exten: %toNum%
CallerId: %callerId%
Timeout: %timeout%
Priority: 1
Variable: C2C_SRC=%interno%
Variable: C2C_DST=%toNum%
Variable: __TENANT_UUID=%tenantUid%
Where:
%callerId% = in “%displayname%” <%number%> format (we set “c2c: %toNum%” <%toNum%>)
%timeout% = the number of milliseconds in which to accept the call on the caller’s terminal (we set 10000)
%tenantUid% = the tenant UUID. It must be indicated even in silge tenant systems; it can be found in the the AMI settings page (with firware version 4.2.x) or the dashboard widget (with firmware version 4.3.x)
With TSP Xtelsio Tapi for asterisk (frequently used to integrate the Estos ProCall application with Asterisk systems), it is not currently possilbe to set these variables in the AMI call, so a mechanism has been developed based on context wrappers to set the required variables.
The AMI message to send is therefore (both modes are supported):
Action: Originate
Async: true
Channel: Local/%interno%@c2c_%tenantUid%
Context: from_c2c_%tenantUid%
Exten: %toNum%
CallerId: "c2c: %toNum%" <%interno%>
Timeout: %timeout%
Priority: 1
Restricted operating mode
Description
This service lets the KalliopePBX administrator specify operating restriction in order to limit certain types of calls while leaving the configuration (extensions, accounts, routing, outbound lines) unchanged.
For the moment, there are three available operating modes:
Full: KalliopePBX is fully operational and there are no restrictions on calls. This is the default mode.
Limited: block outbound calls: allows calls between extensions, KalliopePBX service numbers, and whitelisted numbers. All other outbound calls are blocked.
Disabled: all phone functionality is disabled (account registration, calls between extensions, etc.).
In multitenant PBXs, the operating mode is configurable for each tenant, but only by the pbxadmin.
Configuration
The operating mode can be configured in the PBX –> Operating mode page.
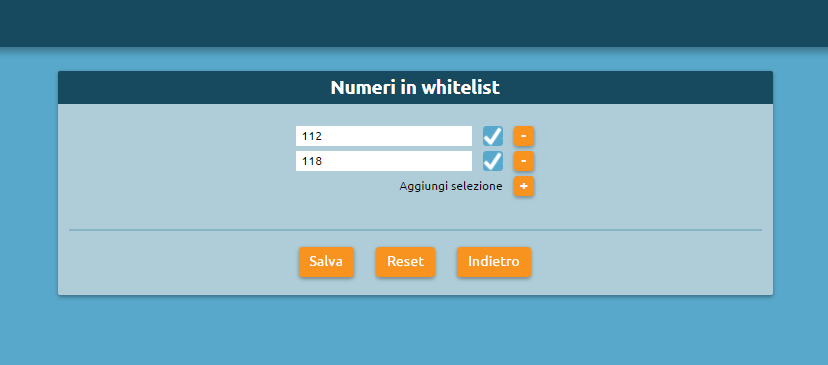
Whitelist
For limited mode, any numbers you wish to allow outbound calls to (e.g. emergency calls) must be added to the whitelist.
This can be done in the PBX –> Whitelist page.
Service Status
Description
Per accedere al servizio di Monitoraggio Servizi basta seguire il percorso “Monitoraggio > Monitoraggio Servizi”.
On the page, you can view and filter the following items to refine your search:
Parameter |
Value |
|---|---|
Extension |
Alphanumeric |
Name |
Alphanumeric |
Surname |
Alphanumeric |
CFIM |
Any value/OFF/ON |
CFBS |
Any value/OFF/ON |
CFNA |
Any value/OFF/ON |
CFUN |
Any value/OFF/ON |
DND |
Any value/OFF/ON |
Fork2Mobile |
Any value/OFF/ON |
Busylevel |
Alphanumeric |
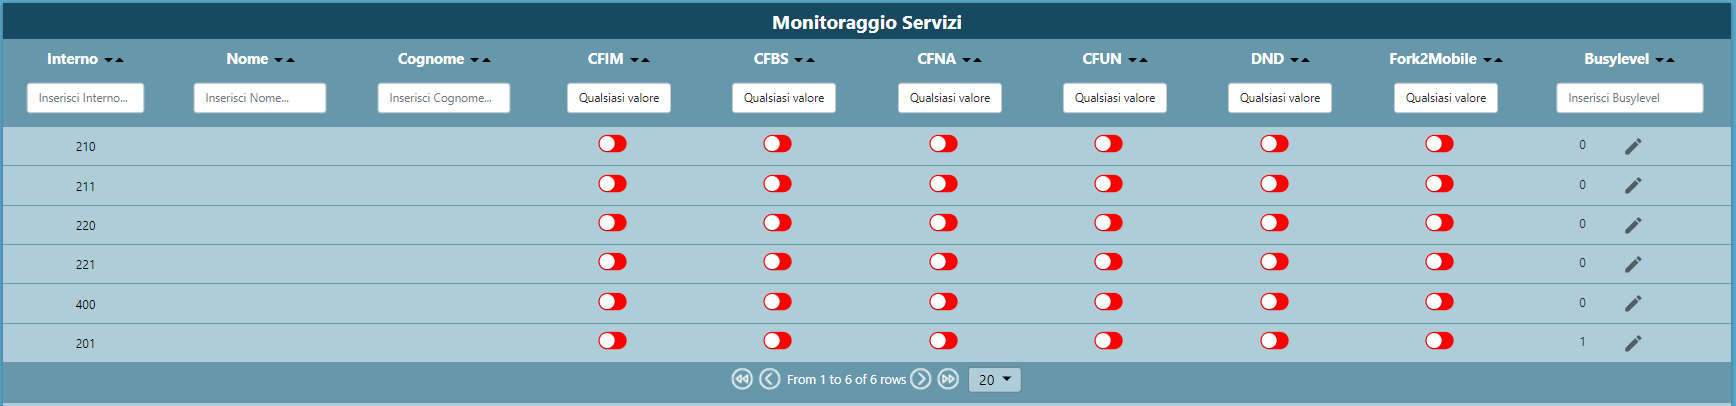
By the edit icon, it is possible to “Enable Busylevel” for a selected extension:

Events Notification
Description
This service lets you monitor the selected events by receiving notifications.
You can associate each selected event to a notification action such as an email or a call to a web service.
Configuration
In the Monitoring → Notifications section, you can manage the notification funcionality
Notification Action List
In Notification Action List you can add a new notification by selecting Email or WebService action.
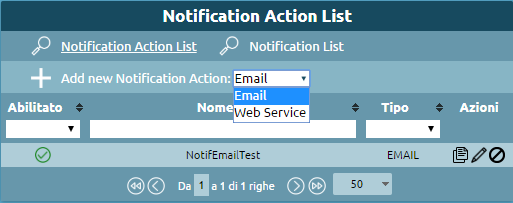
Email
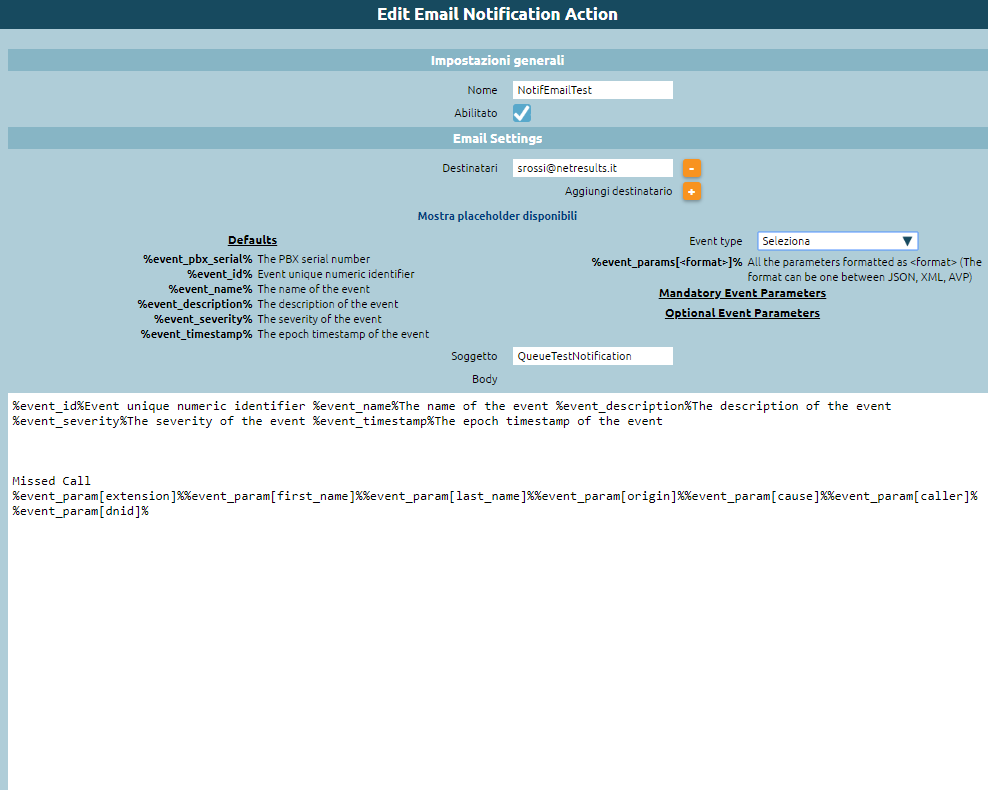
By selecting Add New Email Notification Action, it is possible to define the recipient of the event notification email and the information we want to convey.
The following table shows the parameters you can define for the Email Notification.
Parameter |
Description |
Value |
|---|---|---|
Enabled |
Allows you to disable Email Notification |
Yes / No |
Name |
Notification ID |
Alphanumeric |
Email Settings
Parameter |
Description |
Value |
|---|---|---|
Recipients |
Email address of the recipient of the notification |
Alphanumeric |
Subject |
Objects of the notification email |
Alphanumeric |
Body |
Email text containing both default and event-specific placeholders |
Alphanumeric |
The following table lists the generic parameters:
Parameter |
Description |
|---|---|
%event_id% |
Event id |
%event_name% |
Event name |
%event_description% |
Event description |
%event_severity% |
Event severity (numeric, from 4 to 0 corresponding to DEBUG|INFO|WARNING|CRITICAL|FATAL) |
%event_timestamp% |
Epoch in which the event occurred |
Event-specific parameters are listed in the Notification page; JSON, XML, and AVP formats are supported.
The full set of parameters related to an event can be obtained with the placeholder: %call_params[<format>]%
Web Service
By selecting Add New WebService you can add a new web service notification. You will need to insert the name of the notification in the general settings.
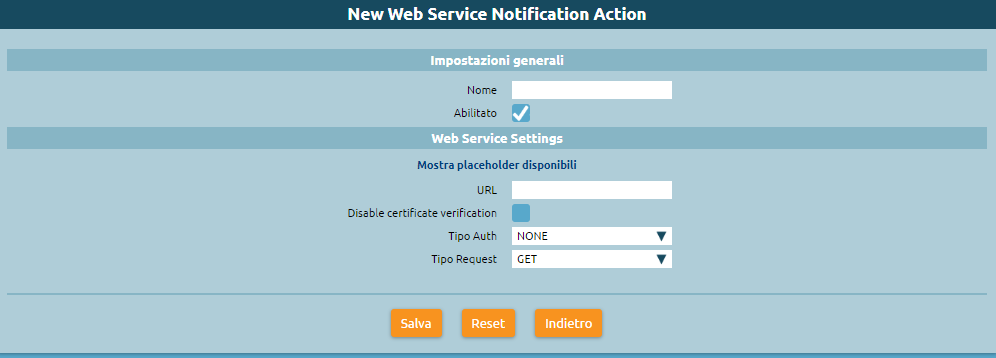
The following table lists the configurable parameters for web service notifications.
Parameter |
Description |
Value |
|---|---|---|
Enabled |
Allows you to disable WebService Notification |
Yes / No |
Name |
Notification ID |
Alphanumeric |
WebService Settings
Parameter |
Description |
Value |
|---|---|---|
URL |
Notification URL |
Alphanumeric |
Auth Type |
Authentication Type |
None/ Basic |
Auth username |
Authentication Username (only in Auth case) |
Alphanumeric |
Auth password |
Authentication Password (only in Auth case) |
Alphanumeric |
Request type |
Type of request |
Get/Post |
Request content |
Content of request (just Post) |
Placeholder |
When the event occurs, a notification will be sent to the external web service, which will handle the information received.
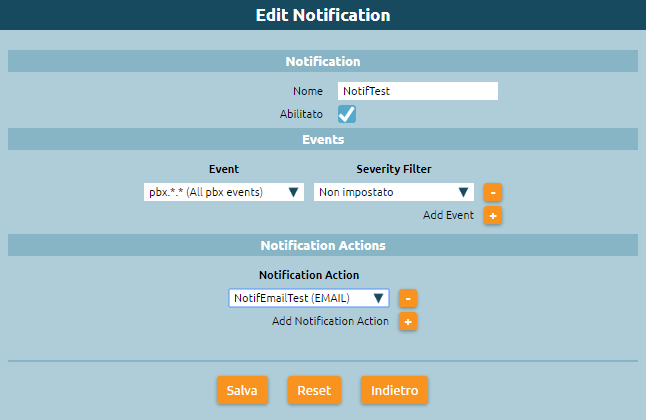
Notification List
In the Notification List section you can select Add New Notification to select the event for which you wish to be receive notifications.
The following table lists the events that can be monitored and with which a notification can be associated.
Event |
Description |
|---|---|
ademco.*.* / alarmreceiver.*.* |
Specific events used by the optional KalliopeLift module to interface with elevator dialers |
cti.client.background |
A CTI (mobile operating system) client was put in the backrground |
cti.client.login |
A CTI client logged in |
cti.client.login-failed |
A CTI client failed a login |
cti.client.logoff |
A CTI client logged out |
mobile-app.call.incoming |
Incoming call to mobile app account |
mobile-app.call.timeout |
The call to the mobile app account has expired |
mobile-app.status.not-logged |
The mobile application is not registered |
mobile-app.wake-up.registered |
The mobile app has been activated |
mobile-app.wake-up.sent |
Alarm notification sent to mobile app account |
mobile-app.wake-up.timeout |
The mobile application does not activate within 5 seconds of sending the notification |
pbx.account.incomingcall |
A call for an extension forwarded to the account |
pbx.account.startcall |
Attempted call to account initiated |
pbx.account.unavailable |
Attempt to call the account not initiated because the account is unavailable |
pbx.call.end |
Call ends |
pbx.call.start |
Call starts |
pbx.dynamic-routing.enter |
A call has entered the Dynamic Routing service |
pbx.dynamic-routing.input |
A new parameter was entered by the caller in the dynamic routing |
pbx.extension.answercall |
Extension call answered by one of the associated accounts |
pbx.extension.failedcall |
Call to extension failed |
pbx.extension.incomingcall |
Incoming extension call |
pbx.extension.missedcall |
An extension missed a call; the event is triggered only if “generate event” is checked in the overflow actions of that extension |
pbx.queue.enqueue |
Call on hold |
pbx.queue.enter |
A call comes in to the queue service |
pbx.queue.ringmember |
A call is presented to a queue operator |
pbx.queue.ringnoanswer |
A selected operator did not handle the call; the call is still in queue and will go to other operators, if there are any and the maximum waiting time has not expired |
pbx.queue.servedcall |
A call in the queue was served, i.e., answered by an operator |
pbx.queue.unservedcall |
A call in the queue was not served globally; therefore, it represents the final outcome of the call that was not served by any operator |
pbx.queuemember.added |
Queue member added |
pbx.queue.enqueue |
A call enters the queue service; the queue is open |
pbx.queuemember.pause |
A queue member entered a pause |
pbx.queuemember.unpause |
A queue member came unpause |
pbx.spy.start |
Supervisor spy started |
pbx.spy.stop |
Supervisor spy stop |
pbx.queuemember.removed |
A queue member is removed |
pbx.wake-up.unanswered |
The wake-up service had no response from the room |
pbx.user.create |
A new Kalliope user has been created |
pbx.user.password-change |
A Kalliope user’s password has been changed |
storage.quota.exceeded |
The storage quota reserved for a specific tenant has been exceeded |
storage.quota.restored |
The storage occupancy of a specific tenant is restored |
The following table lists the configurable parameters for notifications.
Parameter |
Description |
Value |
|---|---|---|
Enabled |
Allows you to disable the notification |
Yes / No |
Name |
Notification ID |
Alphanumeric |
Events
Parameter |
Description |
Value |
|---|---|---|
Event |
Type of events for which you want to be notified |
From list |
Severity |
Event Severity |
Fatal/Critical/Warning/Info/Debug |
Notification Action
Parameter |
Description |
Value |
|---|---|---|
Notification Action |
Association with a NotificationAction |
From list |
When the selected event occurs, you will receive a notification with the desired information.
Practical example
For the “Unserved Call” event, if 103 calls 201, who is a member of the queue QueueTest, and after 5 seconds the caller leaves the service, we can request an email containing information on:
the id of the event
the name of the event
the name of the queue and waiting time
the reason the call was not served
by inserting the corresponding placeholders in the body of the email.
In the Notification List, we associate the “pbx.queue.unservedcall” event to the previously created notification action.
We will then receive an email with the following information:
Unserved
1511212918.0
1
Default
103
201
5
CANCELLED
Or we can receive the following response by inserting the placeholders:
%call_params[<JASON>]% :
 {"reason":"CANCELED","queue_id":"1","uniqueid":"1511212918.0","called_num":"201","caller_num":"103","queue_name":"QueueTest","waiting_time":"5"}

%call_params[<XML>]%

> <?xml version="1.0"?>

> <response><reason>CANCELED</reason><queue_id>1</queue_id><uniqueid>1511212918.0</uniqueid><called_num>201</called_num><caller_num>103</caller_num><queue_name>QueueTest</queue_name><waiting_time>5</waiting_time></response>

> %call_params[AVP]%:

> reason=CANCELED&queue_id=1&uniqueid=1511212918.0&called_num=201&caller_num=103&queue_name=QueueTest&waiting_time=5
Call Detail Record (CDR)
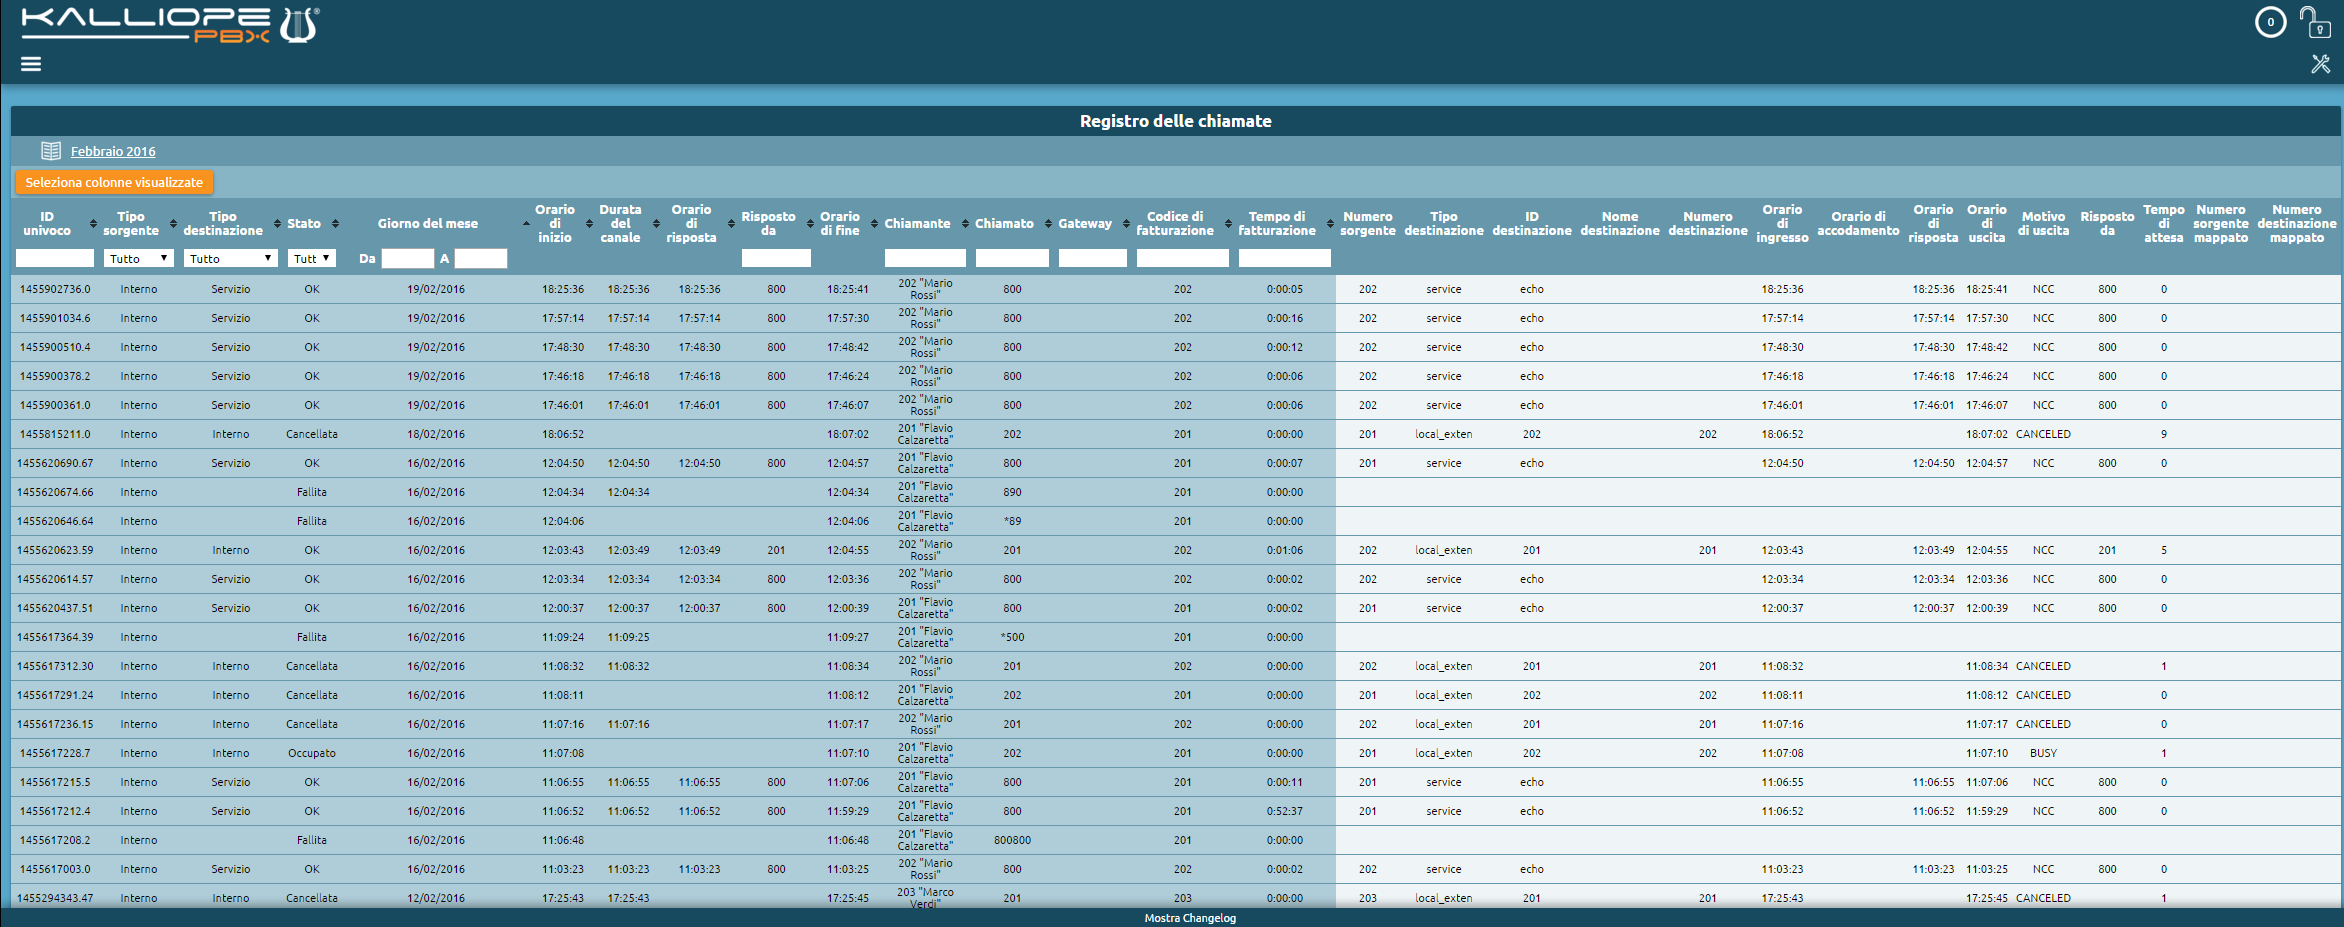
Description
This page lets you view the call detail record through KalliopePBX. A new tab will be automatically created for ease of viewing every month. All the following information are exportable through API REST or in other formats (Excel, XML, JSON, CSV) by clicking on the proper button “Export in format” present in the panel header. All the information contained in the CDR can also be sent periodically as better described in the proper section.
Calls are shown from most to least recent, and display the following information:
Parameter |
Description |
Value |
|---|---|---|
UniqueID |
a unique call identifier |
unique_id |
Source Type |
The type of call source (extension, inbound line, remote extension) |
source_type, click here for possibile value |
Destination Type |
The type of call destination (extensions, remote extension, queue, ring group, IVR, outbound line, service) |
destination_type, Click here for possible value |
Status |
The outcome of the call (failed, busy, canceled, not answered, OK, forbidden) |
status, Click here for possible value |
Day |
Date of the call (day/month/year) |
the date is included in subsequent export timestamps |
Start Time |
Call start time |
start_datetime |
Channel Up Time |
Time of opening of the media channel of the call, i.e. when the PBX answers. In the case of outgoing calls this coincides with the “answer time”. |
channel_up_datetime |
Answer Time |
Call answering time. For incoming calls it indicates the answering time of an extension. For outgoing calls it coincides with the “Answer channel” time. |
answer_datetime |
Answered by |
ID of who answered |
answered_by |
End Time |
Call end time. |
end_datetime |
Caller |
Number and ID (if it is present in the phonebook) of the caller |
caller e caller_name |
Anonymous |
Flag that identifies if the calling number is anonymized (yes/no) |
anonymous (0/1) |
Called |
Number and ID (if it is present in the phonebook) of the called number. In the case of incoming calls it identifies the public number dialed by the caller |
caller |
Gateway Name |
Indicates the gateway or termination used (in the case of outgoing or incoming calls) |
gateway_name |
Account Code |
Indicates the code (or “tag”) assigned to the call. It is possible to assign a “tag” to a particular call using the phone code configurable in the Numbering Plan (available only with the Call Center license). |
account_code |
Duration |
Total duration of the call expressed in hours, minutes and seconds (hh:mm:ss) |
duration |
Bill Time |
Actual call duration once established (following SIP 200 OK message) expressed in hours, minutes and seconds (hh:mm:ss) |
bill_secs (secondi.millisecondi) |
Source Peer Name |
For outgoing calls or calls between extensions, it indicates the SIP source account of the call. |
src_peer_name |
Source IP/Port |
For outgoing calls or calls between extensions, it indicates the IP address and the source port of the call. |
src_ip_port |
Call path
For every call, it is also possible to reconstruct the entire path of the call in the numbering plan, reporting for each step a detail line containing the following fields:
Parameter |
Description |
Exported field |
|---|---|---|
Source Number |
Call source number |
detail_source_num |
Source Number |
Flag that identifies if the calling number is anonymized (yes/no) |
detail_anonymous (0/1) |
Destination Type |
The type of call destination (extension, remote extension, queue, call group, IVR, outgoing line, service) |
detail_destination_type |
Destination ID |
Identifier of the type of destination; in the case of destination “service” indicates the particular service involved, in the case of destination “local_exten” or “voicemail” indicates the recipient extension, in other cases the identifier of the particular destination (e.g. the id of the IVR menu or destination queue) |
detail_destination_id |
Destination Name |
In the case of destination “local_exten” (extension) it shows the name associated with the recipient extension, in the case of destination “queue”, “FAX” or “callg” it shows the name of the recipient entity, in the case of destination “obl” (outgoing calls) it shows the name of the outgoing line used, in the case of destination “service” it shows further details on the service |
detail_destination_name |
Destination Number |
Indicates the destination number in case the “Destination type” is “local_exten” or “obl” (outgoing calls) |
detail_destination_num |
Enter Time |
Time (hh:mm:ss) of call entry in the corresponding detail line |
detail_enter_datetime |
Enqueue Time |
Time (hh:mm:ss) of when the call enters the queue (only if the detail line includes a destination of type “queue”) |
detail_enqueue_datetime |
Answer Time |
Time (hh:mm:ss) the call was answered (only if the call was answered or destined in a voice mailbox) |
detail_answer_datetime |
Exit Time |
Time (hh:mm:ss) of call exit from the corresponding detail line |
detail_exit_datetime |
Exit Cause |
Time (hh:mm:ss) of call exit from the corresponding detail line |
detail_exit_cause |
Answered By |
The number that answered the corresponding detail line |
detail_answered_by |
Waiting Time |
Indicates in seconds the time elapsed between the input time and the response time |
detail_waiting_time (secondi) |
Mapped Source Number |
For outgoing calls it indicates the source number resulting from any manipulation of outgoing calls |
detail_mapped_source_num |
Mapped Destination Number |
For outgoing calls it indicates the destination number resulting from the possible manipulation of outgoing calls |
detail_mapped_dst_num |
Account Code |
Indicates the code (or “tag”) assigned to the call. It is possible to assign a “tag” to a particular call using the phone code configurable in the Numbering Plan (available only with the Call Center license). |
detail_account_code |
You can order the calls according to each parameter and invert the order (increasing or decreasing) by clicking on the header of the corresponding column.
You can filter the CDR by each of these fields (e.g. by viewing only calls from a specific extension or to a specific number, or during a specific time range) by clicking on the box corresponding to the column.
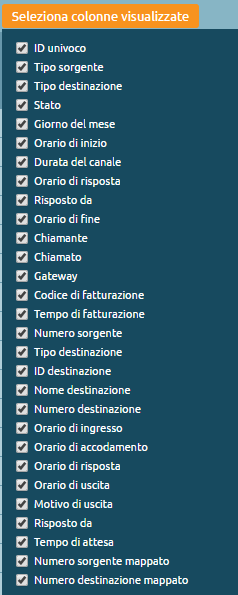
You can also click on Select columns to display to choose which items to show.
List of SOURCE/DESTINATION TYPE and DETAIL SOURCE/DESTINATION TYPE codes
Source/Destination Type:
local_exten –> PBX extension
ibl –> nbound line
obl –> outbound line
service –> PBX local service
callg –> call group
queue –> queue
ivr –> IVR menu
conference –> dialout conference room
fax –> FAX server istance
Detail Source/Destination Type:
local_exten –> PBX extension
ibl –> inbound line
obl –> outbound line
service –> PBX local service
callg –> call group
queue –> queue
ivr –> IVR menu
conference –> dialout conference room
fax –> FAX server istance
dre –> dynamic routing
checktime –> checktime
voicemail –> voicemail
List of EXIT CAUSE and DETAIL EXIT CAUSE codes
Exit cause:
OK –> ended call after being answered from a service/extension/external number
CANCELED –> ended call because because it was cancelled by the caller before it was answered from a service/extension/external number
NOANSWER –> call ended unanswered from a service/extension/external number
BUSY –> ended call because the called number is busy
FAILED –>ended call because there is no rule to route the call (no destination)
UNAVAILABLE –> ended call because destination is not available (e.g. destination phone not registered)
FORBIDDEN –> ended call because it came from an unknown incoming line
?? –> it was not possible to trace the reason why the call ended
Detail exit cause:
CANCELED –> the caller ended the call before it was answered
NOANSWER –> destination did not answer
BUSY –> destination is busy
NCC –> call to destination terminated after being answered (Normal Clearing Code)
ANSWNOACC –> call answered by mobile but not accepted (key 1 not pressed)
PICKUP –> incoming call picked up from another extension
PARKED –> call parked in one of the parking slots
UFWD –> incoming call redirected due to unconditional forwarding
CFWD –> incoming call redirected to another destination
CFWD2MOBILE –> incoming call redirected to the mobile associated to the called extension
FORK2MOBILE –> incoming call was forked to both the extension and the associated mobile number
FASTXFER2MOBILE –> call in progress transferred from extension to associated mobile number
FASTXFER2EXTEN –> call in progress transferred from mobile number to associated extension
BLINDXFER –> call transferred without offer
ATXFER_START –> start a transfer with offer
ATXFER_REFUSED –> the transfer with offer to the destination is terminated because the destination has refused the transfer
ATXFER_BUSY –> the transfer with offer is terminated because the destination is busy
ATXFER_UNAVAILABLE –> the transfer with offer is terminated because the destination is not available
ATXFER_NOANSWER –> the transfer with offer is terminated because the destination has not answered
ATXFER –> call transferred with offer
UNAVAILABLE –> the call is terminated because the destination is unavailable
CONGESTION –> the call to the destination is terminated due to congestion
DECLINED –> the call to the destination has been rejected due to a declined rule on the numbering plan
BLOCKED –> the call to the destination has been blocked by the LCR because there are no lines to route the cal
FORBIDDEN_NOCLASS –> the outgoing call was blocked by the LCR because a class to route the call is not defined
FORBIDDEN_NORULE –> the outgoing call has been blocked by the LCR because no rule is defined to route the call
QUEUE_CALLBACK –> a callback has been requested on a queue
CLOSED –> the destination queue is closed due to time control
Provisioning Requests
Description
To view provisioning requests, you must follow the path “Logs > Provisioning Requests.”
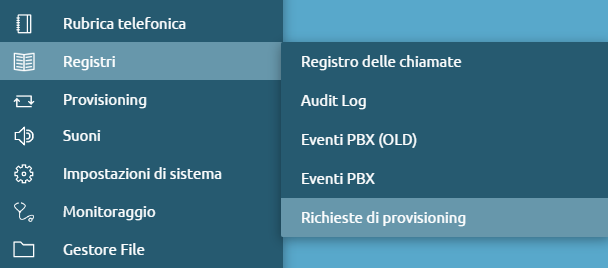
Within this section, provisioning requests that come from the phones are recorded.
You can see:
Day of the month of the request
Timestamp
IP address
Protocol
Certificate identity
User Agent
Requested path
Requesting MAC address
Local path
HTTP status code
Phonebook
Description
The phonebook allows the display of contacts that are in the “Local phonebook” and the “Shared phonebook”. The phonebook can be used via the web interface or the CTI client, in this way you can see phonebook contacts and extensions. By logging in with a non-admin user, but associated with an extension, you can have management of a user phonebook, accessible only via the web interface and via the CTI client. Through CTI desktop, you can only make editing and add contacts to the personal phonebook, to add contacts to the shared phonebook, you have to go to the web interface.
Configuration
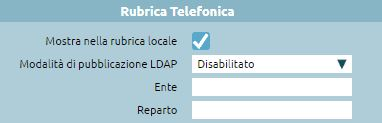
Local phonebook
The local phonebook is populated by extensions that have a particular configuration: the “Show in local phonebook” parameter is active. In the extension settings there is a way to make the presence of the extension visible in the LDAP phonebook. “Organization” and “Organizational unit” can also be entered in the configuration to have these fields populated within the phonebook. In addition, the extension can have associated e-mail address and mobile number, see the Extensions configuration
Note
A non-administrator user does not see the mobile number of other extensions because the mobile number is meant to be a reachability number through the Fork2Mobile service and may be personal and not exclusively business.
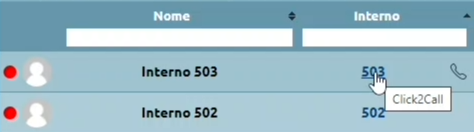
The non-administrator user displays the phonebook list of extensions in the same way as the administrator user, but has an extra feature: when the mouse hovers over the extension number, “Click2Call” appears. When you click on the contact, the central unit starts a call to the extension and you have 10 seconds to answer. When you answer, the central unit starts a call to the destination number. You can export the phonebook in the following formats: XLSX, CSV, JSON, and XML.

Shared phonebook
The shared phonebook contains the contacts visible to all extensions in the pbx.

The shared phonebook is populated by the admin or other users - if delegated - and contains several tabs that can be added manually or imported from EXCEL files.

Through Add New Contact, a contact can be added manually by entering:
First name
Last Name
Organization
Organizational unit
One or more contact information can be associated with the card: the extension, home, work, cell phone, work cell phone, fax, or e-mail. Each contact number, except e-mail, can be associated with a Speed-Dial, a speed-dial code that the user can type in to initiate a call to a particular number without having to remember it and/or without knowing it.
Thus, the phonebook contains the contact numbers entered, which are not directly callable by the central unit.
If you want to make the call to an external number, you must prefix the external line commitment prefix (“0”).
The user can remove the “0” for external calls or decide to use a different prefix, this is changed in the “general settings” panel, via the dl box “Outgoing call prefix”.
If you want to make a call to an extension, by running the Click2Call - feature for the non-administrator user - the central unit calls the user and then triggers a call to the selected extension. For non-internal numbers, the system calls the user and, when answered, starts a call to the selected number by prefixing “0”.
On the CTI client, in the phonebook, the contact details are marked with different icons. Adding a new card - thus a new contact - is not immediately visible within the CTI client, because the phonebook is updated periodically every 10 minutes. If you want to force the update due to urgencies, you can log out and then log back in, so the phonebook import is done automatically when the client starts up.
Export and import
The export of the shared phonebook can be done via XLSX, CSV, JSON and XML. Exporting it in EXCEL (XLSX) format is helpful because the downloaded file will be the same one you can use to do a bulk import. On excel, the contact information for a single card is represented on different rows.
Note
When populating the contactValue column, enter a formation of type “Text” and not “General,” otherwise the “0” is not included if you enter a number with that initial value.
The option Phonebook allows you to:
Replace the current phonebook with the imported one: if this option is not checked, the existing phonebook is integrated with the new one
Choose whether speed dials in the file include the prefix (of the numbering plan).
If you perform the import by not replacing the current phonebook with the imported one, the warning field highlights the operation with the icon:

Note
If there are contacts in the phonebook that have Speed-Dial, when adding new contacts via import, you must put any Speed-Dial without prefix.
Depending on the export format, the fields vary in nomenclature:
XLSX e CSV |
JSON e XML |
|---|---|
FirstName |
firstName |
lastName |
lastName |
organization |
organization |
organizationalUnit |
organizationalUnit |
contactType |
typeString |
contactValue |
|
speedDial |
speedDial |
LDAP settings
To reach the LDAP settings panel, click on “Phonebook > LDAP Settings”

You can make use of the phonebook via LDAP clients. You can make the phonebook available to external LDAP clients: from the phone, via keypad, you can search the central office phonebook. You can also access remote phonebooks exposed by other LDAP servers to make them available to Kalliope users. LDAP (Lightweight Directory Access Protocol) is a protocol that organizes data in the form of a tree hierarchy. The leaves (object class) of the tree are the objects that contain the attributes (first name, last name, email, phone numbers), so each contact record can be considered a leaf of the LDAP tree. A lot of information can be held in LDAP, so when defining the leaf type, you have to provide the object class representing what attributes can be obtained from these objects.
The organization of information in the LDAP tree is as follows:
root: dc=root
Subtrees: dc=default (where default is the domain name of the default mono tenant)
Instead, in a multi tenant node, every time a new tenant is created, a new subtree comes up with dc=domain name For each tenant, there are two subtrees:
dc=users
dc=phonebook
The latter contains other subtrees
dc=extension (contains extension phonebook contacts)
dc=system (contains the phonebook of system contacts)
When the user logs on to the phonebook, they get visibility of everything under the phonebook subtree of their domain.
In the panel, there are enablers for the two subtrees. In the central unit, there is an LDAP server on which you can enable the publication of contacts separately between the internal and shared phonebooks. On LDAP, exposing contacts from the personal phonebook isn’t possible.
System contacts
Configure system contacts unlocks the publication on the dc=system subtree of contacts in the shared phonebook:
System contacts publication tree: the tree is displayed.
Enable publication of system contacts: publication of contacts in the shared phonebook is enabled.
Add prefix for outgoing calls: when the central unit publishes contacts to LDAP, it adds a prefix “0” to all numbers, except those marked as extensions, to make outgoing calls. In this way, the client accessing the phonebook, finds the numbers already ready (including the “0”) to be called
Extensions
You can enable the export of the extension directory to LDAP as a global function.
Extensions publication tree: the tree is displayed.
Extensions publish enabled: the phonebook of extensions can be found searchable via LDAP.
Extension prefix strip: standard extension publishing rule that is used in case you want to display extension numbers not with the extension number, but with the full geographic number
Extension prefix prepend
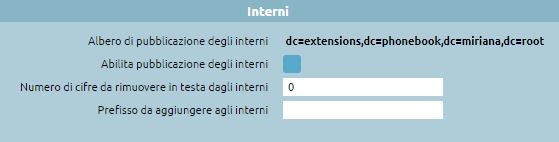
Saving the configuration populates the LDAP tree with the contents of the system phonebook and extensions. You must authenticate with a user who has the right to see the phonebook to access the LDAP phonebook. An LDAP client can be used to consult it.
LDAP client configuration
IP address of the server and port
Base DN: root of the tree that you want to consult
Login credentials to be specified: username and password of user authorized to read the LDAP tree
Kalliope users, defined within the “User and Role Management” panel, are by default authorized to access LDAP. So in the credentials to be specified you enter the user via a specific syntax: cn=user@domain, dc=users, dc=domain, dc=root
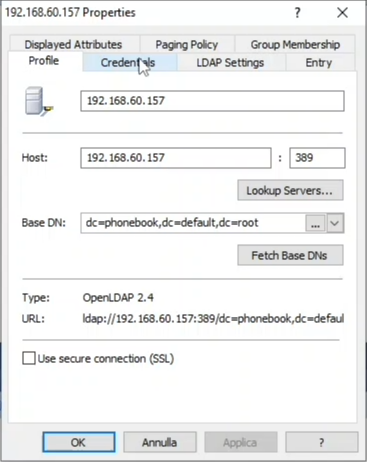
Then, automatically, the client will make the connection to LDAP.
Note
Authentication of users: To gain access via LDAP, users must have a local authentication method; users with domain authentication cannot access LDAP.

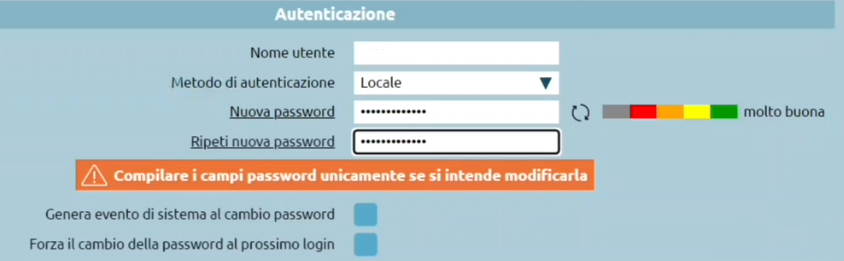
Note
The PBX, not knowing the user passwords, could not write the passwords of each user to the phones. Therefore, using personal credentials to access the phonebook is never performed. Within the PBX, there is a default user, phonebook, who has the right to access and edit the shared phonebook; it is a disabled entity by default, but it can be enabled once a password is assigned. Enabling GUI access (to consult the phonebook and make changes from the web) is required; API access is unnecessary.
Once the connection is made, if you look at the dc=extension subtree, you will see that it is empty. It is a domain, but it has no leaves. It is empty because it is not enough to apply the extension publication in the LDAP settings. Still, each extension has a flag that checks whether it should be published to the internal phonebook and/or LDAP phonebook. In the template default extension, the “LDAP publishing mode” must be enabled. There are also ways to make the extension’s presence visible on the LDAP phonebook.
According to LDAP publishing rule: exposes the extension number with a manipulation to convert it to a geographic number.
Presenting the telephone number below: exposes the extension number with a specified number
According to the LDAP publication rule applied to the extension below: assigns a dummy extension and the masking specified in the LDAP panel is applied
If the dc=system subtree has leaves, the system contact directory has been correctly populated with all the attributes of the tab.
givenName
sn: surname
cn: common name, is constructed by doing concatenation of first name (givenName) and last name (surname)
o: organization
ou: organizion unit
Objects collected and described under an LDAP tree are characterized by a chain of object classes. Each object class has a set of mandatory or optional attributes. If it activates a filter on an object class, an LDAP client that wants to read the phonebook can decide how to perform a search.
Importing remote phonebooks
The import of remote phonebooks can be reached by clicking on “Phonebook > Import Remote Phonebooks.”
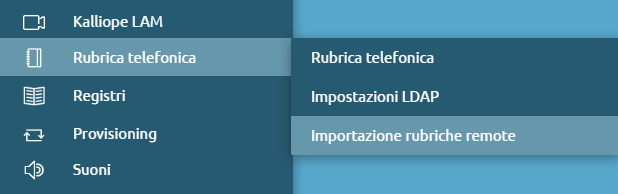
This section offers the possibility of importing contacts in LDAP phonebooks into the Kalliope central unit. A real-time query is not done every time there is a need to consult the phonebook, but a complete import of the contacts in the phonebook is done and entered inside the Kalliope internal database. This import is done periodically. It is possible to define more than one.
Pressing on “Add a new LDAP remote phonebook” will take you to the remote phonebook creation page.
LDAP server settings
Name
Host address
Host port
Version: V3 / V2 (obsolete)
RDN: root of the subtree you want to query.
Authentication enabled
Username
Password
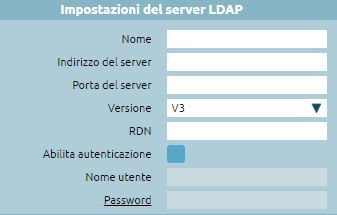
Search settings
You can filter only contacts that have as ObjectClass person, organizationalPerson, inetOrgPerson
Provider type: Generic / estos MetaDirectory
Include results in (ObjectClass=person)
Include results in (ObjectClass=organizationalPerson)
Include results in (ObjectClass=inetOrgPerson)
Access via SSL is not provided. Metadirectory is software that acts as a phonebook aggregator: it takes data from different sources (LDAP servers, text files, databases), reads it and republishes it in LDAP form to be read by LDAP clients..
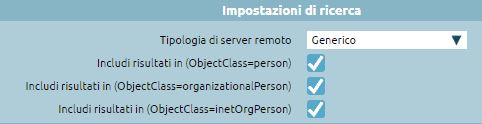
Import Settings
Import enabled
Import periodicity: repeated every (tot hours)/repeated every day at the
Incoming call phonebook loopup enabled: contacts in this phonebook are used to set first and last name based on the calling number
Export to cti enabled: CTI clients receive the contacts in the LDAP phonebook from the central office when importing
Show in GUI enabled: the client accessing the interface sees the contacts that are on the remote phonebook in the phonebook
Import contacts as extensions: phone numbers found in the remote phonebook are entered into the local import database as extensions (extensions). When you then go to show them to clients, they will be treated as internal numbers. Any click2call will occur to the exact number, without putting the “0” in.
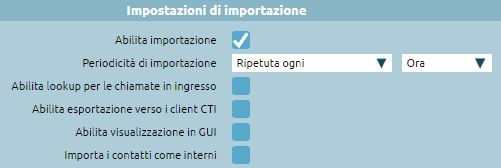
Import settings
Enable publishing to local LDAP: if you want to export the contacts that I imported, make them accessible to phones. This function is helpful for aggregating: this way the central unit presents both the contacts in the shared phonebook and the remote phonebooks.
Add outbound prefix: as in publishing system contacts, you can add the “0” to contact these numbers as if they were external.
If you check the above option “import contacts as internal,” the “0” is omitted because they are reached with the short number.
Contacts in the remote phonebook are visible in the shared phonebook to the administrator; non-administrator users can only see them in the shared phonebook if the “Enable display in GUI” flag is present. With each incoming call, the central unit consults whether the calling number is in a phonebook. If so, it goes to edit the call display name (caller name) to insert the value present in the phonebook and corresponding to that caller number. In the case of direct calls to an extension, the personal phonebook is used as a priority, while for calls to groups or queues, the shared phonebook is used.

On Call Services
This section of the Kalliope interface lets you configure codes for on-call services.

The only service for which it is not possible to set a custom code is canceling an attended transfer, which by default is *0.
The codes for the following services are freely customizable.
Service |
Default |
|---|---|
Attended call transfer |
*4 Transfer, *0 Cancel transfer, *9 Shuttle, *3 Convert to a three-way conference |
Blind call transfer |
#4 |
Call parking |
#8 |
Fast transfer |
|
Call recording on demand |
*1 |
Call hang-up code |
*0 |
Usage Statistics
Warning
Usage statistics are available only if the multitenant license is active.
Description
The service can be reached through “Logs > Usage Statistics”.

The usage statistics are a useful tool for viewing the yearly and/or monthly trend of PBX center utilization. The page shows how occupancy is growing at the PBX level.
Tenants defined with the Name, Domain, and UUID are displayed. The first number represents the number of extensions configured on the Tenant, the second is the number of FAX instances, and the third is the number of hotel rooms that have been created.
The display can also be scaled to the current month and the previous month with the display of individual days of the month.
You can also export data in the following formats:
XLSX
CSV
JSON
XML
SNMP Support
Description
Protocol Operation
SNMP is the standard for network management and monitoring. Thus, it is a protocol used to monitor the state of a machine, specifically, to acquire from a monitoring server external to Kalliope status parameters related to CPU load, memory occupancy, disk space, and concurrent calls. It is a standard protocol available on Kalliope; OIDs (monitored objects) are made available on the central. Those defined in the standard MIB 2 are used, where object identifiers are made available through the agent. The server is the monitoring system that queries, while the SNMP agent is the service used to expose the data to a client that requests it. SNMP involves the client requesting the agent to find out the value of the OID, and the agent returns the value.
The data within the agent is organized in the form of a tree. The data indicate, for example, the version of the primary and secondary firmware, information regarding telephone services, the size of virtual memory occupied by the process, and the total number of failed authentication attempts by SIP clients.
Objects are defined as an index of a leaf under a parent: a tree structure allows you to access by specifying the path address between the subtrees to the leaf, which is the object you want to monitor. SNMP provides:
Manager
Agent
Protocol
The representation of an OIP is done as a sequence of numbers, e.g., 1.3.6.1.2.1.4.6 is the path within the tree, and each point in the path has its textual correspondence.
Configuration
To enable NSMP support, go to “System Settings > SNMP Settings” and hit the “Enabled” checkmark.
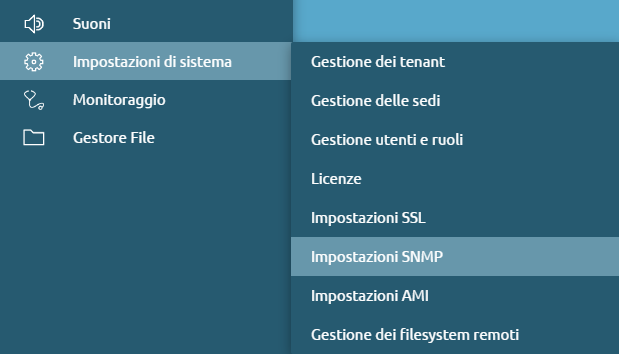
System info
The following information is mandatory; if it is not entered, the SNMP service cannot start.
sysName: is a particular OID under the system tree (which is the first child and is denoted as 1.3.1.2.1.1), sysName is the machine name and is 1.3.6.1.2.1.5.0 (the 0 at the bottom since it is scalar type).
sysLocation: is the physical location, it acts as a kind of inventory
sysContact: email address of the contact person to contact if there is an anomaly in that particular node
In the defined settings, MIB tree 2 and host-resources (1.3.6.1.25) are the two that are exposed on Kalliope. Proprietary MIBs are also exposed and the software can read the whole tree since it scans it entirely, and it is the agent’s job to return the values. The MIBs file allows the software monitoring to know the single leaf that only knows by number what it is.
The iReasoning MI Browser client was used for the configuration examples, it can make SNMP queries and shows the subtree organization.
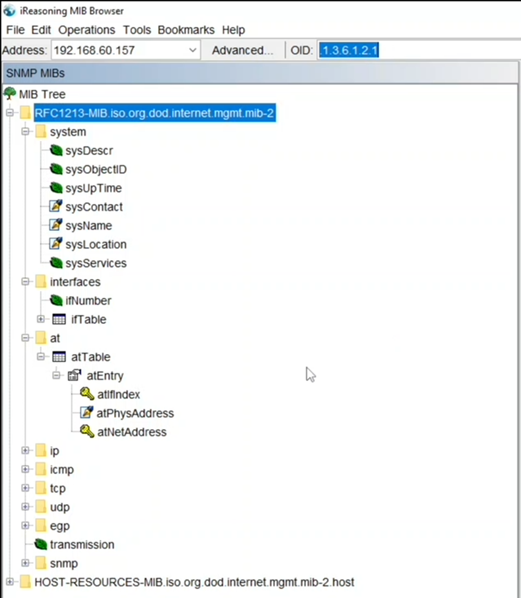
SNMP Access Settings
Listening address: e.g., by default 0.0.0.0 means it listens on all interfaces of the central unit. But, if we have a PBX with multiple network interfaces (some public and some private) and you want the SNMP service to be accessible from only one of these interfaces, you can put the IP address of the interface you want the service to be active. Then you can do a bind of the service on the IP entered; this must be one of the central unit’s IPs (either one of its interfaces or that of the High Reliability in the case of a cluster). In the last case, in the case of HA, explicit monitoring should be done not pointing to the resource IP but the individual IPs of the two nodes.
Listen port: 161 is the standard port since SNMP uses the UDP transport protocol.
Community v1/v2: these are the basic versions of SNMP supported by monitoring systems, SNMP v3 support is not yet enabled. The default value that is used is “public”
ACL: Access Control List, is a restriction on which IP address the client must have for querying. If an SNMP request comes in outside the ACL, it is rejected.
Warning
ACL 0.0.0.0/0 is not recommended, it is always good to restrict access only to authorized IPs
TRAP settings
Traps are a reactive-type mechanism that SNMP agents have for notifying the occurrence of events. Kalliope has not added specifications to the system, and basic ones are present:
0: ColdStart
1: WarmStart
2: linkDOwn
3: linkUp
4: authenticationFailure
5: egpNeighbortLoss
6: enterpreseSpecific
Directions on the configuration of TRAPs:
TRAP send mode: specify whether you want to send the trap in version 1 or 2
TRAP destination address: indicate IP address of the monitoring server to send TRAPs to
TRAP destination port: e.g. 162 is the standard one
On the dashboard, the execution of the SNMP service is indicated by the green dot and the “Active” status.
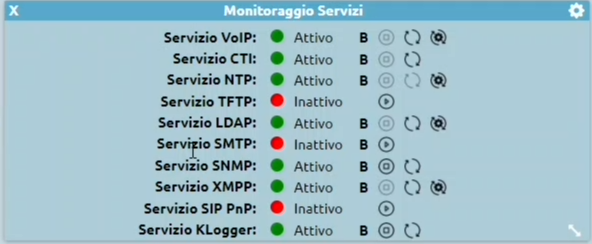
You can do an agent query on Kalliope via any SNMP client (in this case you can use the iReasoning MIB Browser). You need to indicate the IP address to connect to and then set up:
Agent NSMP Version: the default values with which to make the request, i.e. you can choose whether to make it in version 1 or 2
Agent Read Community: what is the read community in order to get access to the data
Agent Port: you can indicate the standard port, 161
Agent Write Community: the ability to do write via SNMP is not enabled
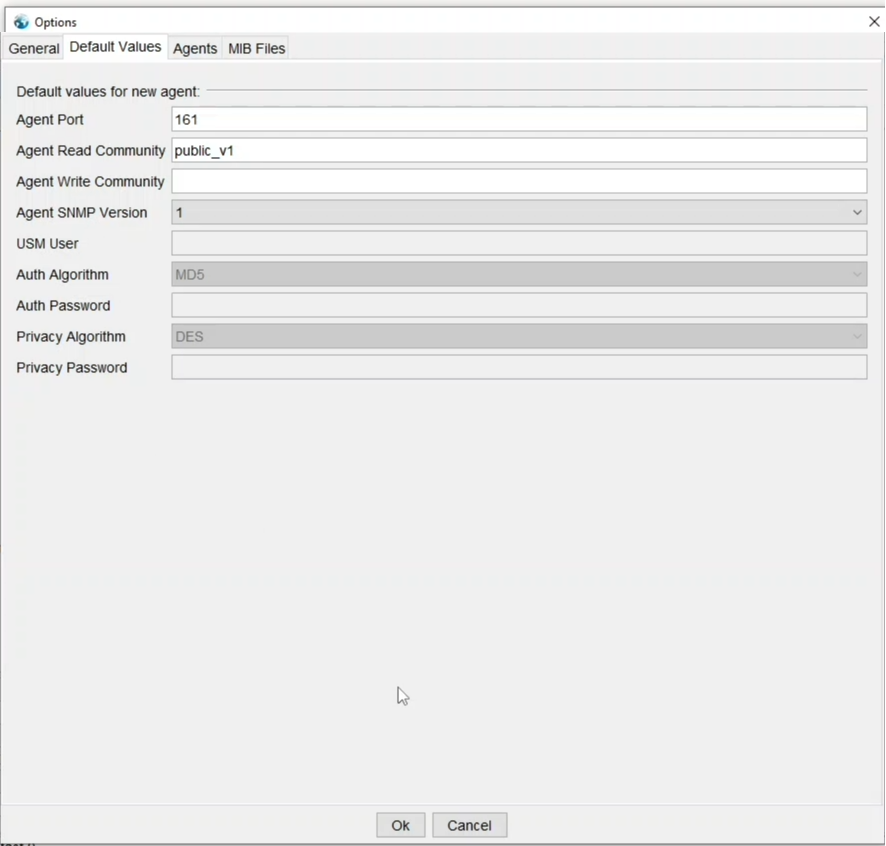
After making the query, it is possible to read the contents of the tree that is present on Kalliope. The reading can be done on an object-by-object basis: The subtree system present the following information including the sysContact, sysName and sysLocation.
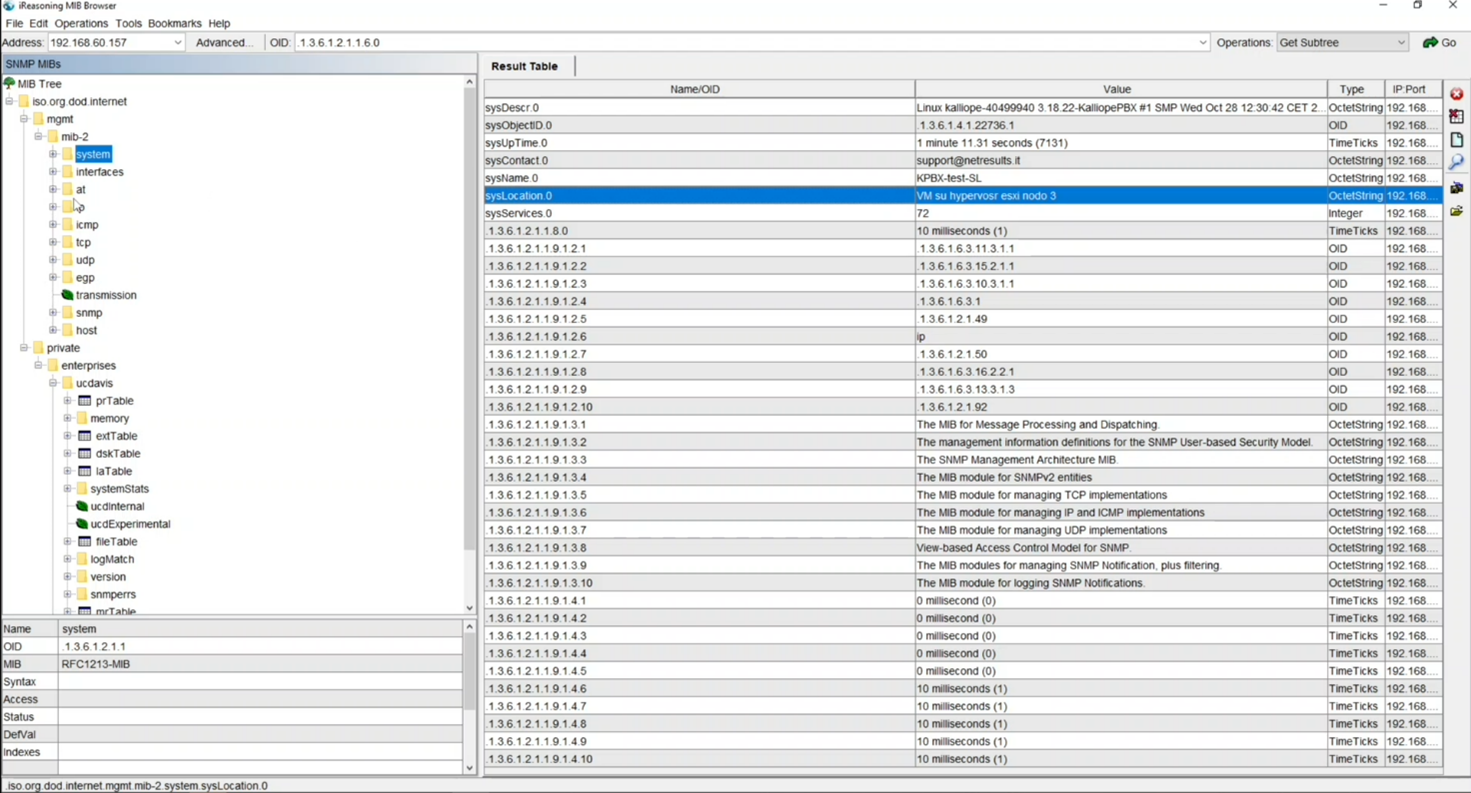
The interfaces panel returns the various interfaces present and for each indicates the operational status and bytes exchanged in and out, this allows monitoring systems to show the occupancy graph:
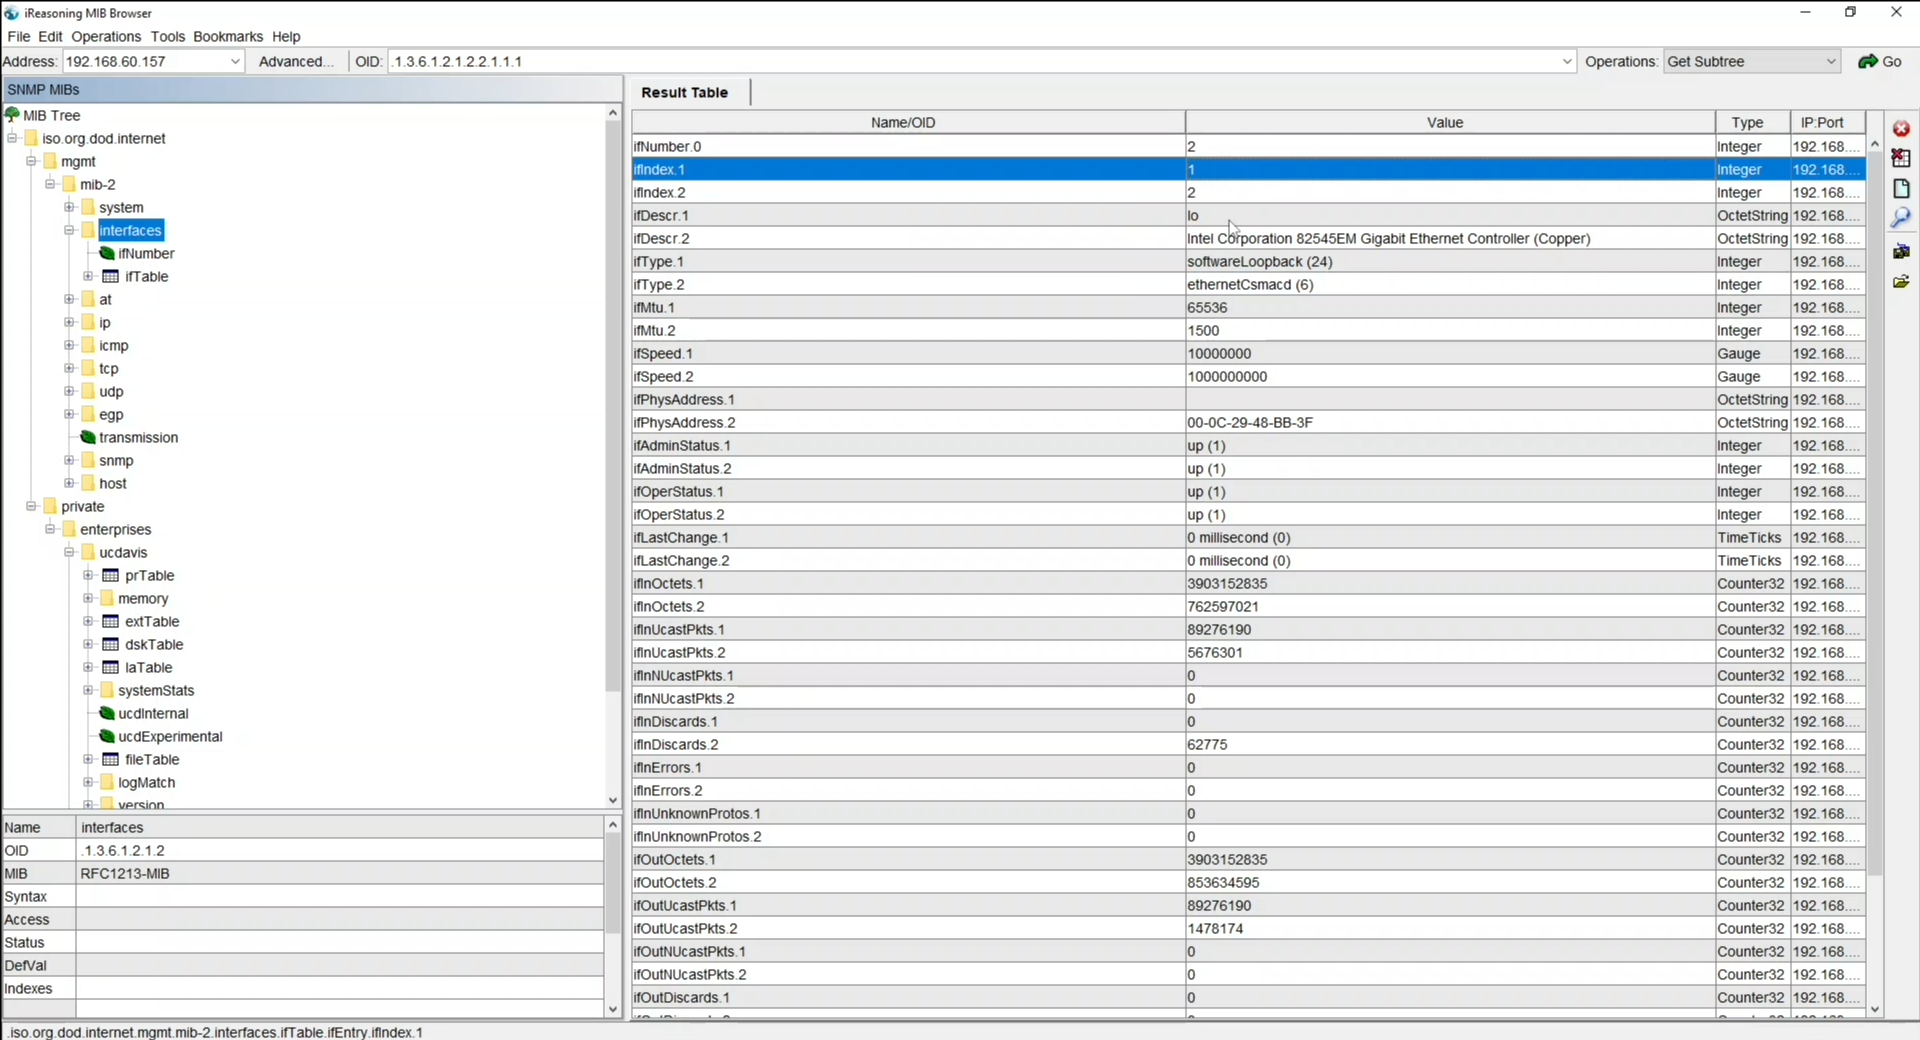
kpbxNode example:
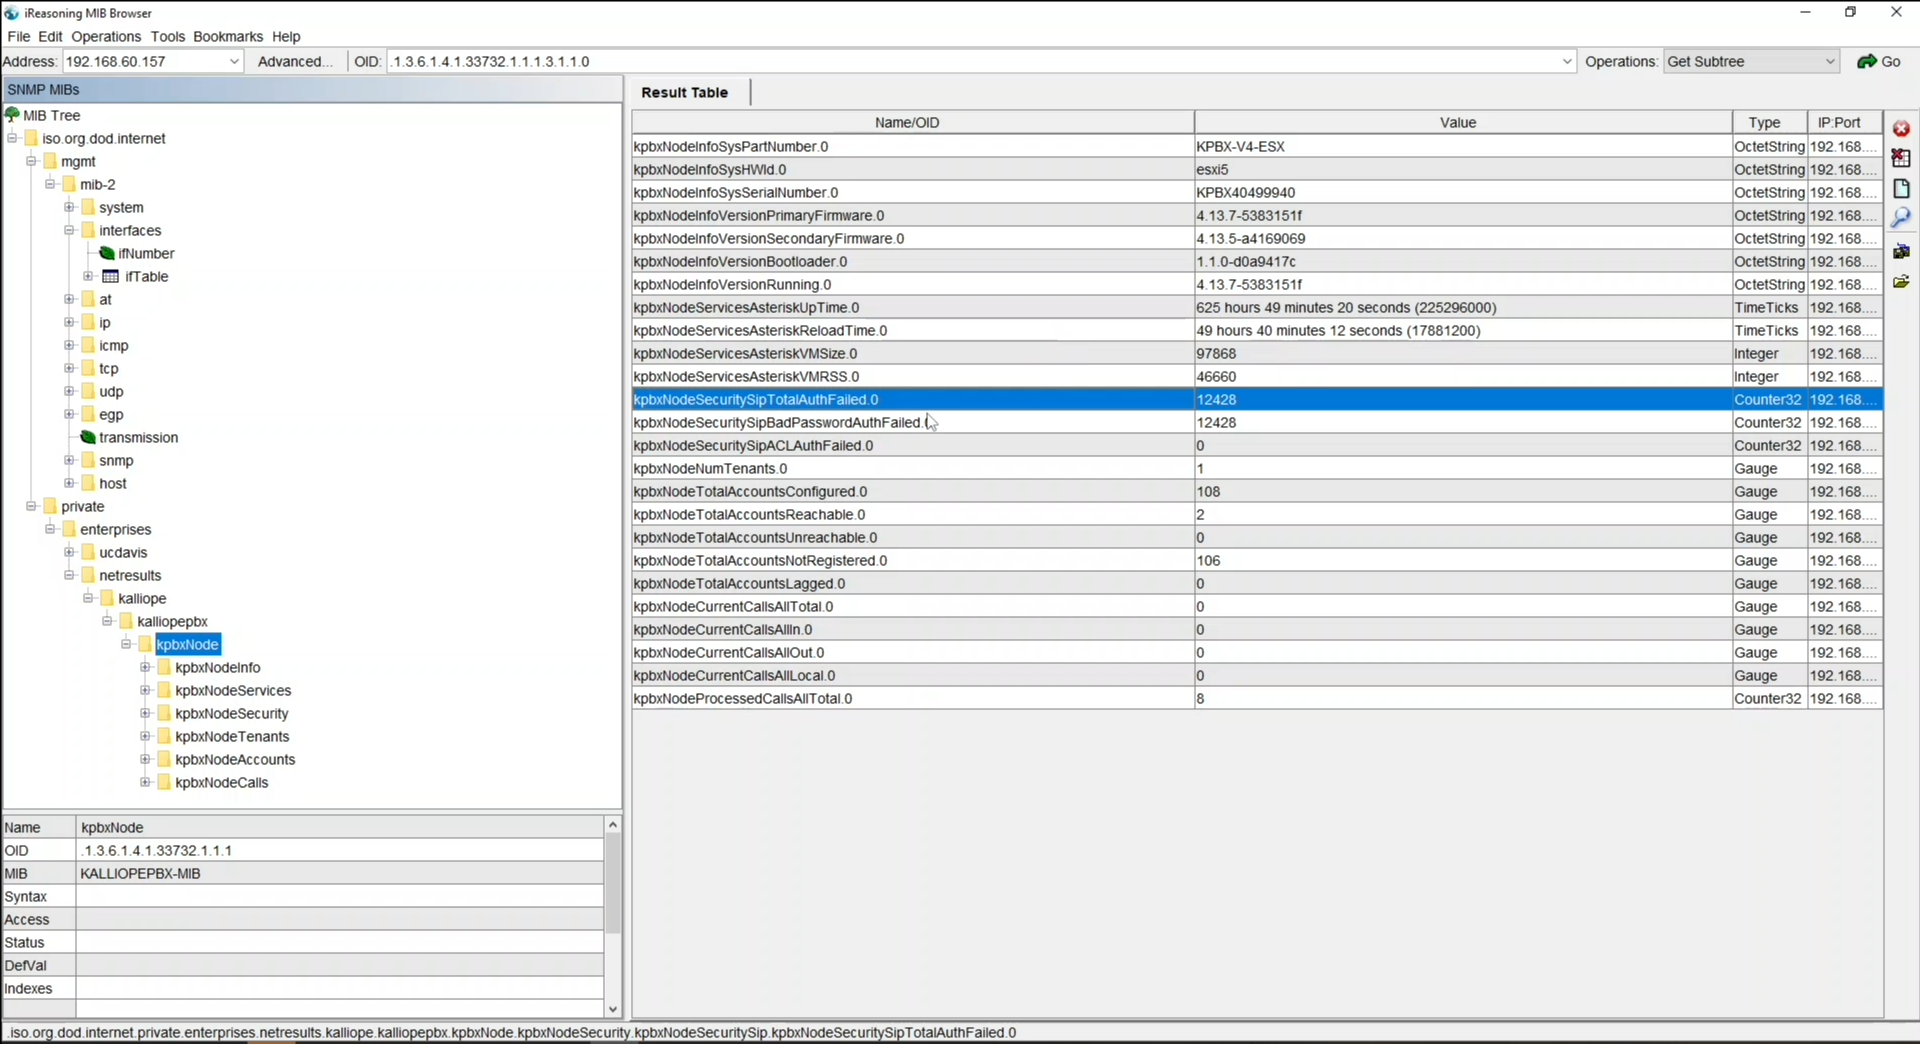
Note
The counter of failed authentications (highlighted in blue) is essential data because if a burst of failed authentications comes in, it is likely to be an attack from outside.
KalliopePBX implements MIBs that allow you to monitor the functioning of the equipment through the SNMP standard communication protocol. The MIBs that can be consulted are:
RFC1213-MIB - This MIB defines objects for managing and monitoring an entity in a TCP/IP network. On KalliopePBX the following subtrees are implemented: system, interfaces, at, ip, icmp, tcp, udp, transmission, snmp OID: 1.3.6.1.2.1.1/2/3/4/5/6/7/10/11
https://datatracker.ietf.org/doc/rfc1213/
RFC 2790 Host Resources MIB - This MIB defines a set of objects containing the configuration of hosts (servers/computers) connected to a TCP/IP network independently of the operating system, the network services, and the installed software. OID: 1.3.6.1.2.1.25
https://datatracker.ietf.org/doc/rfc2790/
UCD-SNMP-MIB - This MIB defines objects for monitoring the performance of a host (e.g. CPU /RAM / disk occupation). OID: 1.3.6.1.4.1.2021
http://www.net-snmp.org/mibs/UCD-SNMP-MIB.txt
Kalliope MIB - This proprietary MIB provides information on the configuration and the functioning of the services implemented on the Kalliope node, such as number of configured or registered accounts, simultaneous calls, total number of calls. OID:1.3.6.1.4.1.33732
Download the MIB definitions files:
MIB definitions
Recovery Mode
You can access the KalliopePBX recovery console from the resource IP address (192.168.0.100 by default) on port 10080 in HTTP.
The recovery console displays information on the product and the firmware, and lets you:
register the product (this serves as a timestamp for the beginning of the warranty and free firmware updates);
activate a virtual machine using an activation key (only for VM);
update the bootloader;
reset to factory default by installing firmware on a partition.
Clicking on each release will display new features and bug fixes. You can also choose on which partition to install the selected firmware.
Warning
Installing firmware from the recovery console will erase all information on the partition. Firmware installation should be performed through the Kalliope configuration GUI and not the recovery console.
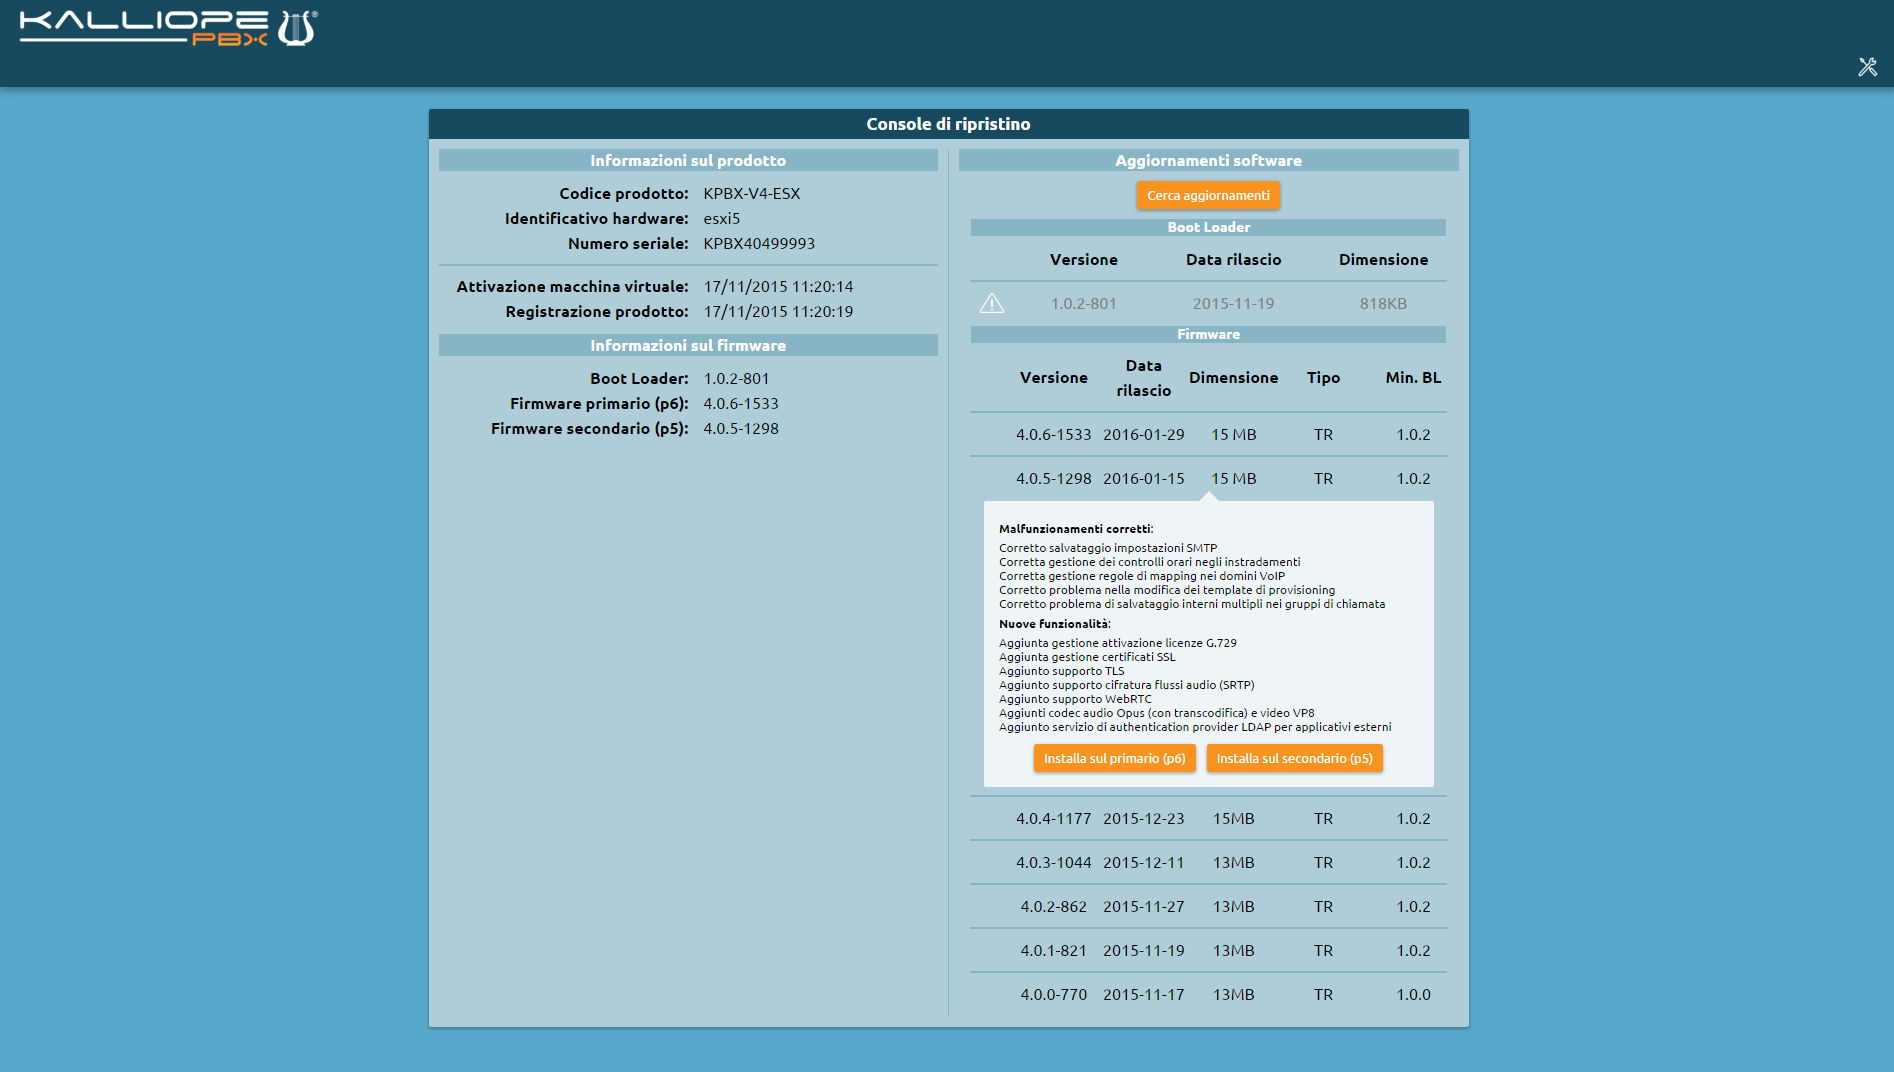
Firmware Update
From the system menu, you can access the Update management section. Just as with the recovery console, this section displays information on the product and the currently installed firmware.
By clicking on Find updates, you can access the list of available updates, both for the bootloader (which can only be updated from the recovery console) and for the firmware. Clicking on specific releases will display the changelog, which lists new features and bug fixes.
Updates that cannot be installed (because they have already been installed or because they require an extra step) are grayed out and shown next to an alert icon. Updates that are available for installation will instead appear in a black font.
Clicking on an available update will begin the download, extraction, and installation process on the secondary partition.
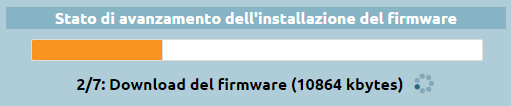
KalliopePBX has two partitions dedicated to saving firmware: one for the primary firmware, and one for the secondary firmware.
Under normal conditions, the main partition will contain the firmware currently in use. During an update, the new firmware will be installed on the secondary partition. Once the update is finished, you will be presented with the option of rebooting the PBX using the secondary firmware. By logging in as admin, a banner will appear on the configuration GUI informing you that the firmware in use is the secondary one. You can then click on Make primary to promote the firmware version and update the PBX (you will first need to acquire the lock).
You can return to a previously installed firmware version by rebooting on the secondary firmware from the shutdown menu.
Warning
Since the configuration of the PBX is saved in the same partition as the firmware, restoring the secondary firmware will also restore the corresponding settings.